This menu option is used to create messages that will print on the Payroll Check stubs. These messages may be specific to a Company/Division, Job/Sub Job, and/or Employee Class.
When the message is set up as Class specific, the system uses the Employee Class entered in the Employee Master file.
When the message is set up as Job/Sub Job specific, the system uses the last job entered at payroll entry time. Employee Class messages are ignored when a Job specific message exists. If Class and Job specific messages do not exist, the Company/Division specific message serves as the default.
The message hierarchy is:
1. Job/Sub Job
2. Employee Class
3. Company/Division
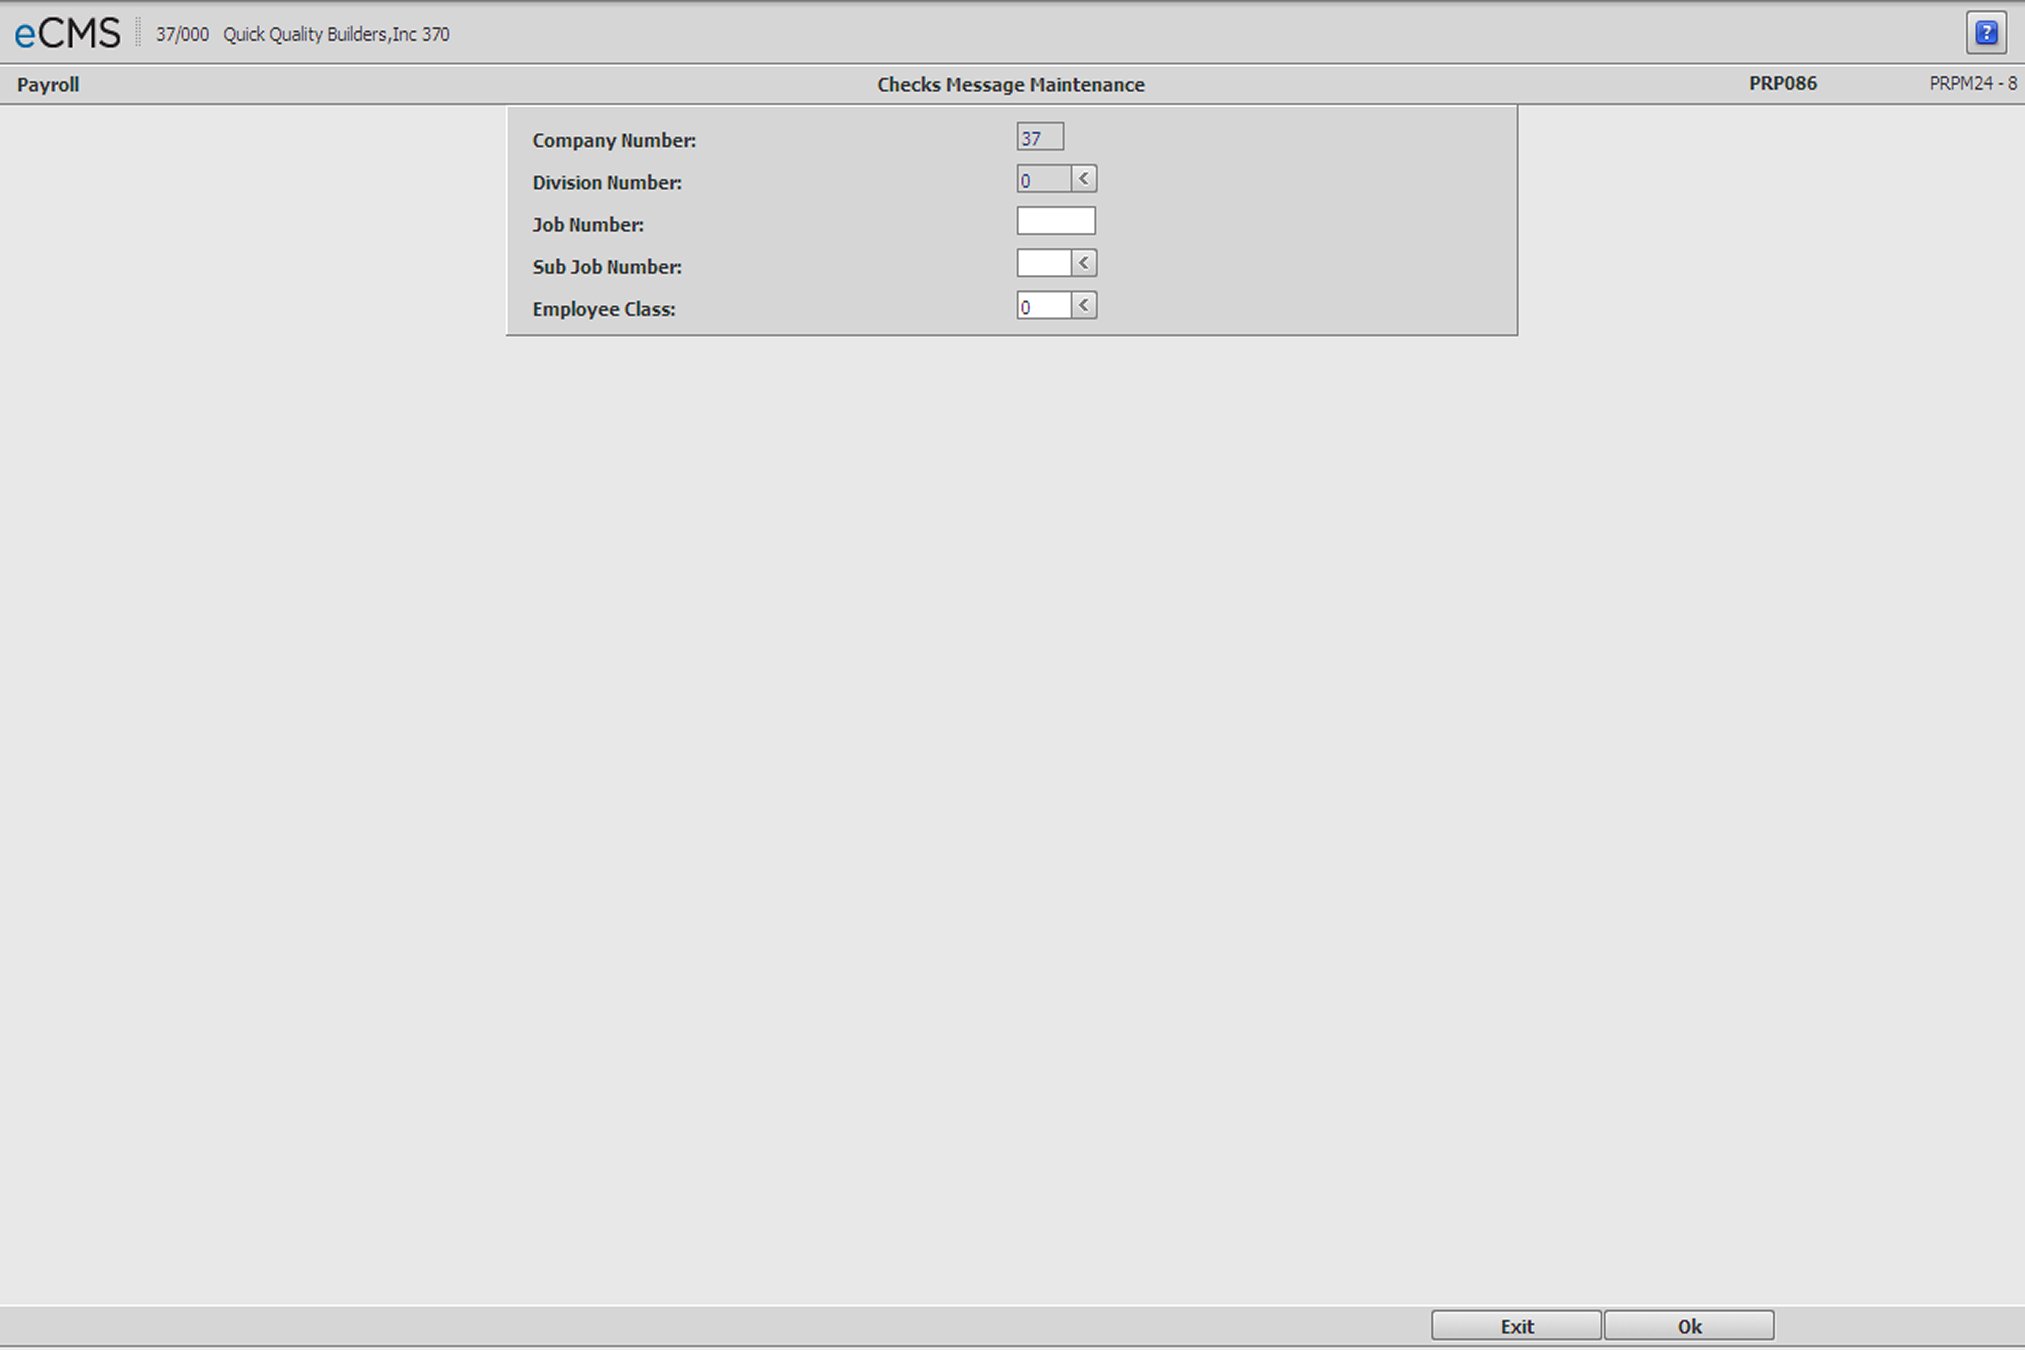
Checks Message Selection screen
Company/Division Number
Accept the Company/Division used at login, or click the Division Number prompt to make these selections from a list. The message being set up will only become specific to this Company/Division in the absence of Job/Sub Job and Employee Class entries.
Job/Sub Job Number
Enter a Job/Sub Job number, to make this message specific to a Job/Sub Job. Click the Sub Job prompt to make these selections from a list.
Employee Class
Enter an Employee Class code, to make this message specific to an Employee Class. Click the prompt to select from a list.
Click to save changes and display the Checks Message Detail screen. |
|
Click to return to the Main Menu without saving changes. |
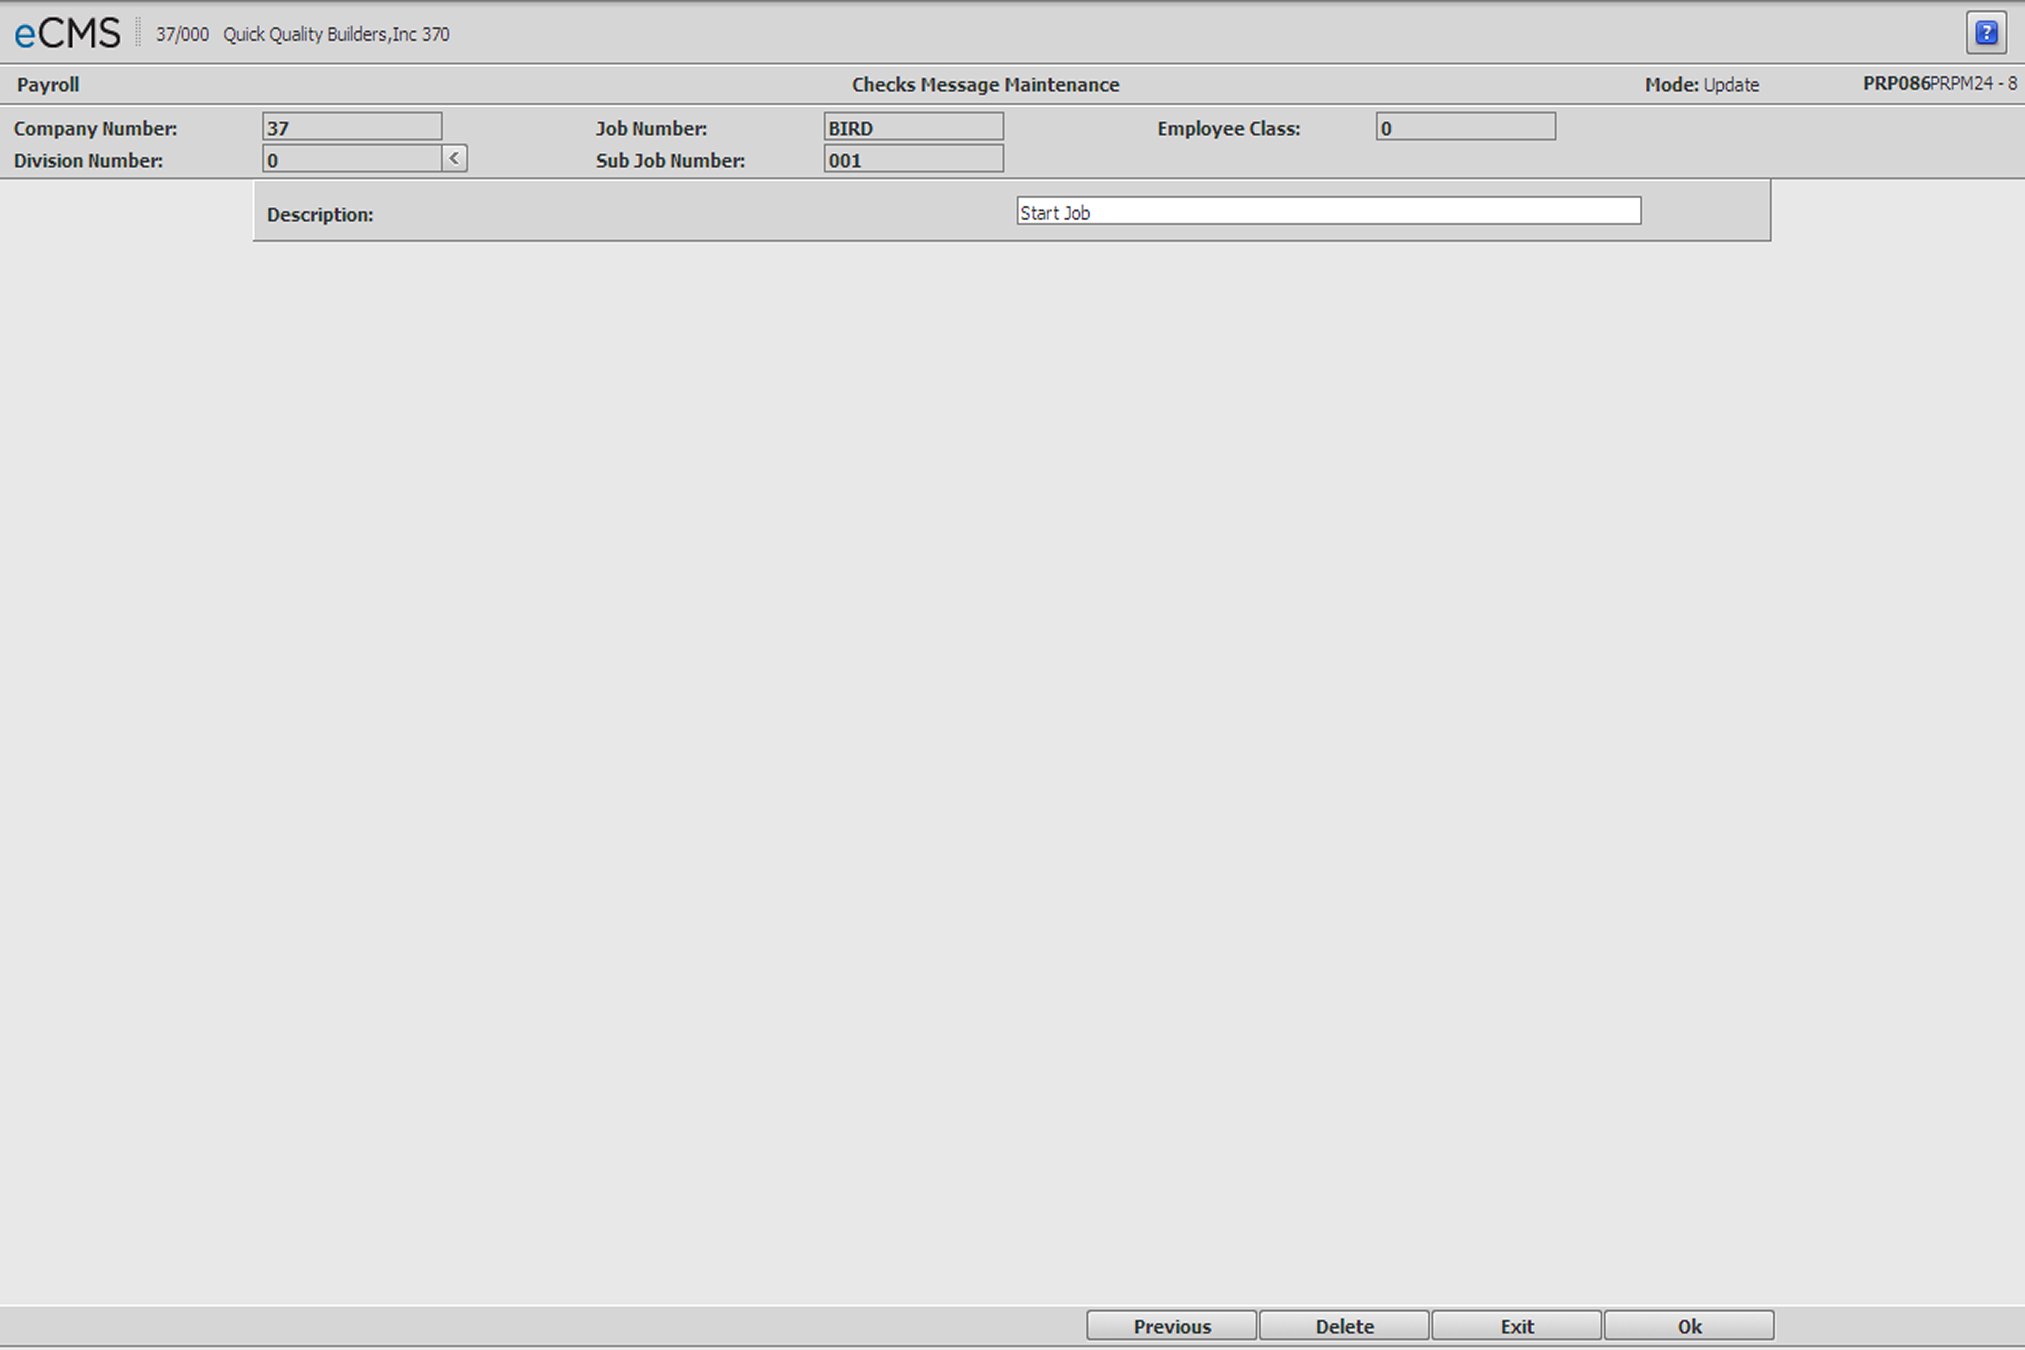
Description
Enter a Check Message of no more than 75 characters.
Click to save changes and return to the Checks Message Selection screen. |
|
Click to return to the Main Menu without saving changes. |
|
This button displays if you are modifying an existing message. Click to delete current record. |
|
Click to return to the Checks Message Selection screen without saving changes. |
![]()