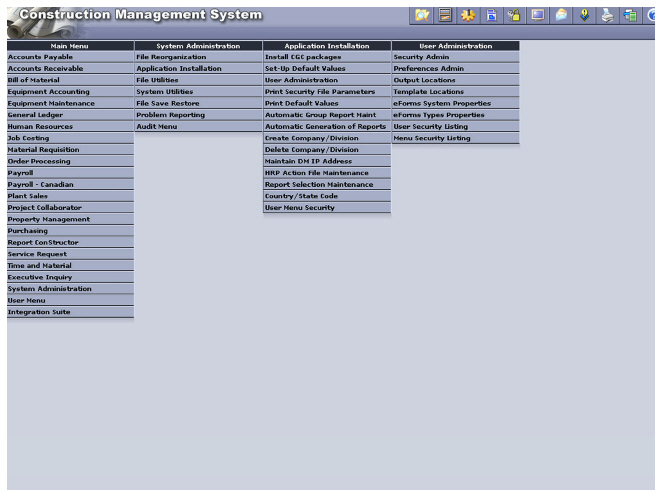
Use this option to configure the security and administrator settings for users and groups, and set up the Output Locations, Template Locations, and eForms properties that will be used to route distributions.
Where do you want to go?
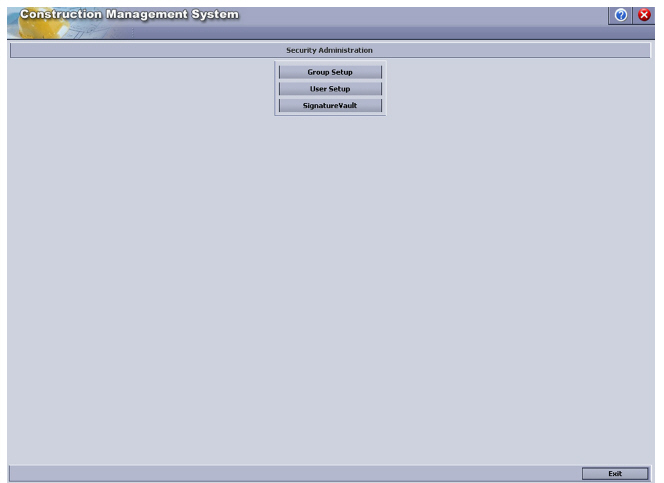
The Security Administration screen is used to maintain group and user profiles. The Group profile contains each group authorization for the eCMS applications and their individual menu options. The User profile contains information about the user, any groups assigned to the user, and the Companies and Divisions to which the user has access. Within the user profile by Company/Division, authorizations such as Job security, Department access, Sub Account access, Pay rate, and Timecard are displayed. Executive security status is also established at the user level.
|
This option is used to assign application and program permissions to groups. Click this tab to access the "Group Profile Setup". |
|
This option is used to assign application and program permissions to individual users. Click this tab to access the "User Profile Setup". |
|
This option is used to set up the user check signing permissions required for Accounts Payable and/or Payroll check runs. Click this tab to access the "Signature Vault Setup". |
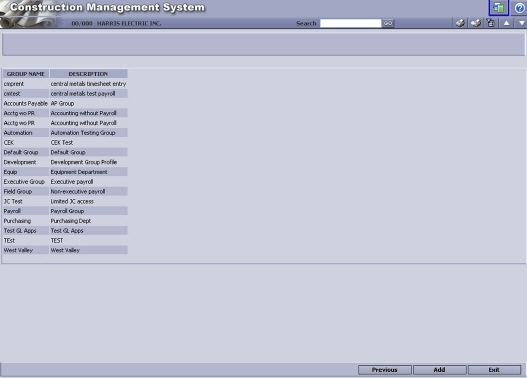
Locating a Group Profile record
There are three methods available to locate a Group Profile.
Vertical Scroll arrows
Click the![]() up/down
arrows to page through the records list.
up/down
arrows to page through the records list.
Search
Enter a Group Profile name, or partial name, in the search field and click Go to re-position the list on that value.
Filter
Click the Filter icon![]() to reposition
the list according to user-defined search criteria.
to reposition
the list according to user-defined search criteria.
Creating a new User Profile
Click![]() to
access a blank record on the "Group Profile Detail
screen" and create a new Group Profile.
to
access a blank record on the "Group Profile Detail
screen" and create a new Group Profile.

Group Name
Enter the name of the new group that you would like to add, or if editing an existing group, make the appropriate changes to the group name.
Description
Enter a description to associate with the group name, or if editing an existing group name, make any appropriate changes to the existing description.
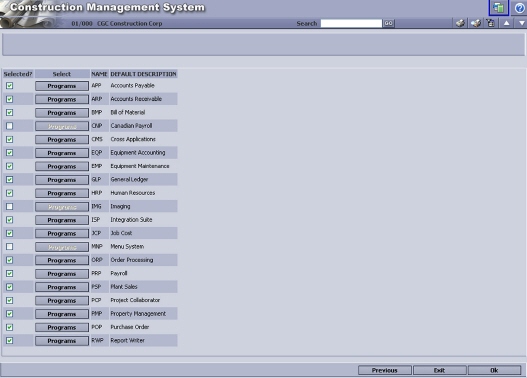
Applications
Once you have added a new Group Name and Description, you can select the new group from the "Group Profile Setup" by clicking on the desired group name. Once you click the group name, you will return to the Group Profiles screen with the Application button displayed.
Click![]() to display the "Group Profile Application
Selection".
to display the "Group Profile Application
Selection".
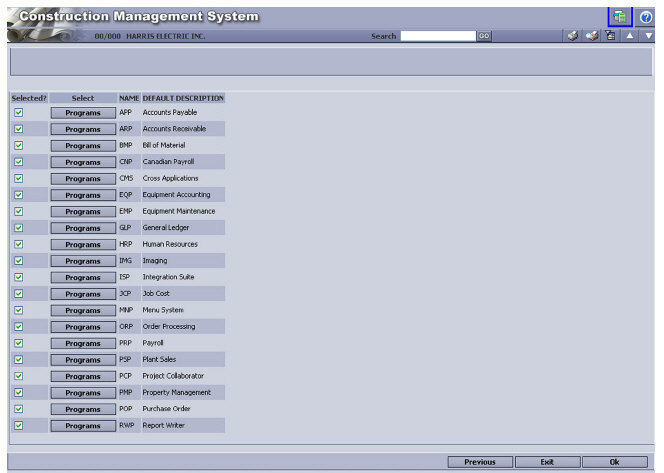
Group Profile Application Selection
Use this option to restrict group access to selected Applications.
Note If none of the Application check boxes are selected, the group will have access to all. If an Application has been selected, the group will be granted access to the selected Applications only.
Locating an Application
There are three methods available to locate an Application.
Vertical Scroll arrows
Click the![]() up/down arrows
to page through the list.
up/down arrows
to page through the list.
Search
Enter an Application name, or partial name, in the search field and click Go to re-position the list on that value.
Filter
Click the Filter icon![]() to reposition
the list according to user-defined search criteria.
to reposition
the list according to user-defined search criteria.
Selected
Select the check boxes next to the programs you would like to assign to the group.
Programs
Access is granted to all programs within each selected
application. Use![]() to access the "Group Profile Program
Selection screen" on which to restrict access to
individual programs within the selected application.
to access the "Group Profile Program
Selection screen" on which to restrict access to
individual programs within the selected application.
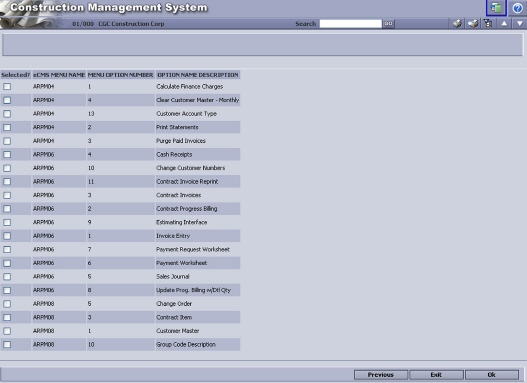
Group Profile Program Selection screen
This screen is used to restrict group access to specific Menu options within an application.
Note If none of the Menu option check boxes are selected, the group will have access to all. If a Menu option has been selected, the group will be granted access to the selected Menu options only.
Locating a Menu option
There are three methods available to locate a Menu option.
Vertical Scroll arrows
Click the![]() up/down arrows
to page through the list.
up/down arrows
to page through the list.
Search
Enter a Menu option name, or partial name, in the search field and click Go to re-position the list on that value.
Filter
Click the Filter icon![]() to reposition
the list according to user-defined search criteria.
to reposition
the list according to user-defined search criteria.
Selected
Select the check boxes next to the Menu options you would like to assign to the group.
OK
Click![]() to
add the selected Menu options to the selected group.
to
add the selected Menu options to the selected group.
Modify an existing User’s profile by clicking that name in the list.
Locating a User Profile record
There are three methods available to locate a User Profile.
Vertical Scroll arrows
Click the![]() up/down arrows
to page through the records list.
up/down arrows
to page through the records list.
Search
Enter a User Profile name, or partial name, in the search field and click Go. The list will display names containing the value entered.
Filter
Click the Filter icon![]() to reposition
the list according to user-defined search criteria.
to reposition
the list according to user-defined search criteria.
Creating a new User Profile
Click![]() to
access a blank record on the "User Profile Detail
screen" and create a new User Profile.
to
access a blank record on the "User Profile Detail
screen" and create a new User Profile.
The User Profile screen shown here is used to modify an existing record. It contains options that aren’t available on the screen used to create a new profile.
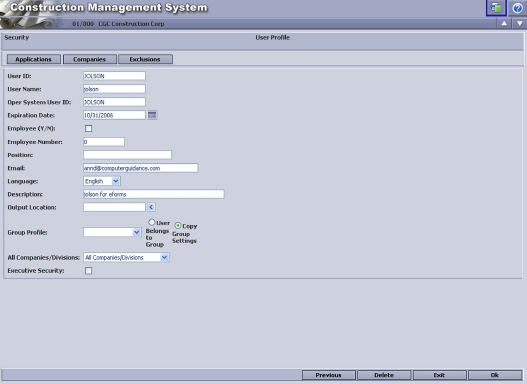
User ID
Enter the user ID.
User Name
Enter the user’s name.
Oper System User ID
Enter the user iSeries login account ID.
Expiration Date
The Expiration Date is the date this profile will no longer be valid. It, in affect, “turns off” an established User Profile. A possible use for an Expiration Date would be in the case of temporary employee where the termination date was preset.
Employee (Y/N)
Select this option if this user is an employee.
Employee Number
Enter the Employee Number if known (optional).
Position
Enter the Employee’s position in the organization (optional).
Required. Enter an email address for this Employee.
Language
Click the drop-down prompt and select the user’s primary language.
Description
Use this field to enter any pertinent user information.
Output Location
An Output Location refers to the physical location of an e-mail or fax server. When set up, it determines where and how to direct a distribution. At least one Output Location must be set up. Output Locations can be set up at:
System Administration | Application Installation | User Administration |
Output Locations
Enter an existing Output Location, or click the prompt to select from a list.
Group Profile
Select a pre-existing group profile to apply to the selected user. You may also leave the group profile blank to not apply a group profile to the selected user.
User Belongs to Group/Copy Group Settings
If the User Belongs to Group option is selected, the group profile will always determine what application permissions the user has. Any change made to the group will automatically apply to this user.
If the Copy Group Settings option is selected, the selected group profile is copied to this user’s profile, but is not updated when group changes are made. The group settings will only be copied when this user is initially set up, and will need to be manually updated if any future changes are required.
All Companies/Divisions
This selection will determine which options are displayed on the login screen. It will also determine if the data displayed in lookup tables, and generated on reports, is for all Companies/Divisions, or Single Companies/Divisions.
Selecting this option does not grant the user access to all Companies and Divisions. You must continue to the "User Profile Company/Division Selection screen" to make those selections.
Screen differences
eCMS currently employs two different screen technologies, Web facing and Socket, and the All Companies/All Divisions field functions are determined by the type of screen you are currently using.
A Socket screen will have a prompt, on the Company and Division fields, that will display only the Company/Divisions to which the user has been granted access. Web faced screens have no such prompt and the user can enter any existing Company/Division and gain access.
All Companies/All Divisions |
Web faced screen: Employee will have access
to All Companies and All Divisions. |
Single Company/All Divisions |
Click the Companies tab and select the Company to which this Employee will have access. |
Single Company/Single Division |
Click the Companies tab and select the Company to which this Employee will have access. |
Executive Security
|
Click this tab to display the "User Profile Company/Division Selection screen" (see page 2-141). This screen is used to select the Companies and Divisions this User will be authorized to access. |
The following tabs will only display when modifying an existing profile.
|
This tab will only be available when the Copy Group Settings option was selected. Click this tab to display the "User Profile Application Selection screen" (see page 2-139). This screen is used to select the Applications this User will be authorized to access. |
|
This tab will only be available when the Copy Group Settings option was selected. |
DELETE
Click to delete this User Profile.
PREVIOUS
Click to return to the "User Profile Setup".
OK
Click to save this User Profile and return to the "User Profile Setup".
User Profile Application Selection
Use this option to restrict user access to selected Applications.
If none of the Application check boxes are selected, the user will have access to all. If an Application has been selected, the user will be granted access to the selected Applications only
Locating an Application
There are three methods available to locate an Application.
Vertical Scroll arrows
Click the![]() up/down arrows
to page through the list.
up/down arrows
to page through the list.
Search
Enter an Application name, or partial name, in the search field and click Go. The list will display Application names containing the value entered.
Filter
Click the Filter icon![]() to reposition
the list according to user-defined search criteria.
to reposition
the list according to user-defined search criteria.
Selected
Select the check boxes next to the programs you would like to assign to the user.
Programs
Access is granted to all programs within each selected
application. Use![]() to access the "User Profile Program
Selection screen" on which to restrict access to
individual programs within the selected application.
to access the "User Profile Program
Selection screen" on which to restrict access to
individual programs within the selected application.
User Profile Program Selection screen
This screen is used to restrict user access to specific Menu options within an application.
If none of the Menu option check boxes are selected, the user will have access to all. If a Menu option has been selected, the user will be granted access to the selected Menu options only

Locating a Menu option
There are three methods available to locate a Menu option.
Vertical Scroll arrows
Click the![]() up/down arrows
to page through the list.
up/down arrows
to page through the list.
Search
Enter a Menu option name, or partial name, in the search field and click Go. The list will display Menu options containing the value entered.
Filter
Click the Filter icon![]() to reposition
the list according to user-defined search criteria.
to reposition
the list according to user-defined search criteria.
Selected
Select the check boxes next to the Menu options you would like to assign to the user.
OK
Click![]() to
save these changes and return to the "User Profile Detail
screen".
to
save these changes and return to the "User Profile Detail
screen".
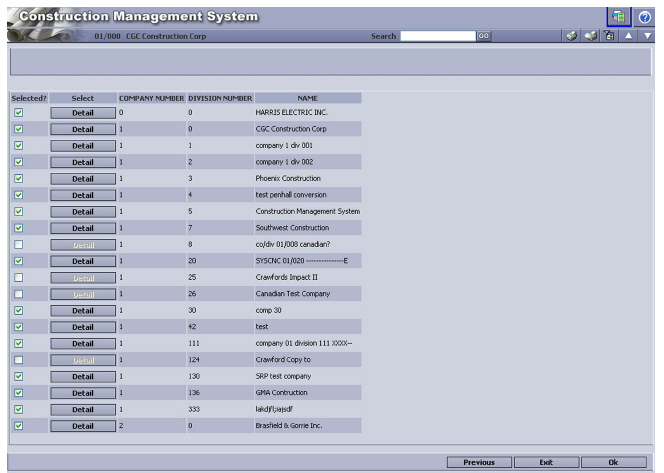
User Profile Company/Division Selection
This screen is used to grant user access to specific Companies and Divisions.
The user will have access to only those Companies/Divisions selected on this screen. This is true even if the person’s User Profile is set to All Companies/Divisions.
Locating a Menu option
There are three methods available to locate a Menu option.
Vertical Scroll arrows
Click the![]() up/down arrows
to page through the list.
up/down arrows
to page through the list.
Search
Enter a Menu option name, or partial name, in the search field and click Go. The list will display Menu options containing the value entered.
Filter
Click the Filter icon![]() to reposition
the list according to user-defined search criteria.
to reposition
the list according to user-defined search criteria.
Selected
Select the check boxes next to the Menu options you would like to assign to the user.
DETAIL
Click![]() to access the
"User Profile Company/Division Detail screen".
to access the
"User Profile Company/Division Detail screen".
OK
Click![]() to
save these changes and return to the "User Profile Company/Division
Selection screen".
to
save these changes and return to the "User Profile Company/Division
Selection screen".
User Profile Company/Division Detail
This screen is used to grant access and permissions, and to assign other security properties that together will constitute this user’s Company/Division profile.
|
Note Changes made to a User’s security setup will not take affect until the next time the User clears security. Click the Security icon on the toolbar to access the security screen. |
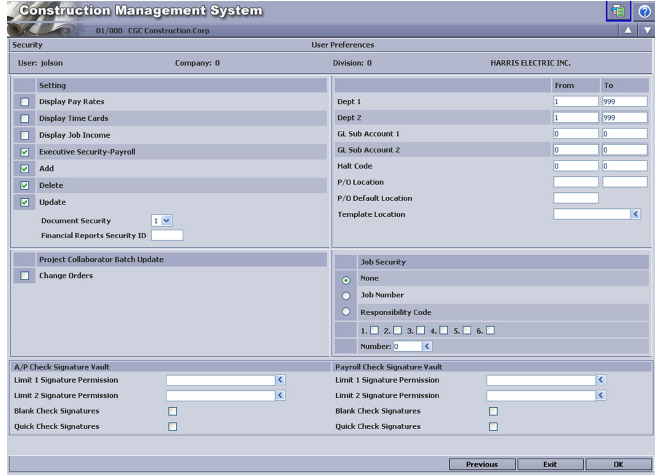
Each section of the User Profile Company/Division Detail screen is described separately below.
Miscellaneous Settings
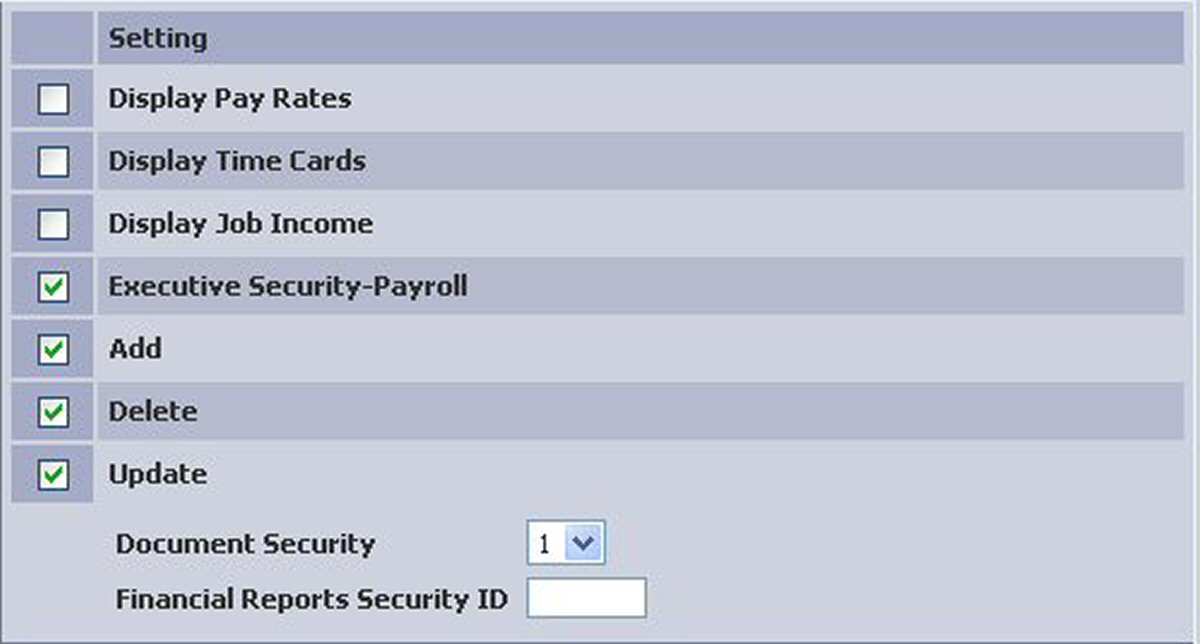
Display Pay Rates
Select this option to display Pay Rates on the Payroll screens.
Clear this option to prevent Pay Rates from being displayed on the Payroll screens and from printing on the Payroll Edit. They will, however, print on the Payroll Processing Reports (Proof, Register, etc.).
Display Time Cards
If this check box is selected, this user will have names associated with the time cards to which they have access.
Also, payroll hours are printed on the Detail Job Cost Report and displayed on the Job Cost Detail Inquiry screen.
Display Job Income
Select this option to permit this user to execute reports with job income (Summary Contract Analysis, Summary Job Analysis, etc.) and display income when using the Summary Job Inquiry.
Executive Security-Payroll
Select this option to allow this user access to the Executive Payroll.
Note At least one user must be granted Executive Security-Payroll status in order to create executive employee master records and process executive payroll.
Add/Delete/Update
Select the permissions to assign to this user. These currently only have affect in the Payroll application.
Add |
User can add records |
Delete |
User can delete records |
Update |
User can update records |
Document Security
This field works in conjunction with the Enter Documents option in Subcontract Processing. The Document Security level is assigned to documents when they are set up in the Accounts Payable, File Maintenance, Document Description option. Click the prompt and select one of the following Document Security Levels:
0 |
No security required |
1 |
Allows access to documents with a Document security level of 1 |
2 |
Allows access to documents with a Document security level of 2 |
3 |
Allows access to documents with a Document security level of 3 |
4 |
Allows access to documents with a Document security level of 4 |
5 |
Allows access to documents with a Document security level of 5 |
6 |
Allows access to documents with a Document security level of Level 1 and level 2 |
7 |
Allows access to documents with a Document security level of Level 1, level 2, and level 3 |
8 |
Allows access to documents with a Document security level of Level 1, level 2, level 3, and level 4 |
9 |
Allows access to documents with a Document security level of All Levels |
Financial Reports Security ID
When you enter this security ID, then you can only use the financial report formats (format IDs) mapped to this financial reports security ID to
• Display a selection of reports to print
• List reports using Prompt
• Print the Financial Reports Security ID File Listing
If you leave this field blank (no entry), and this security code is set up for all Companies/all Divisions, then this security code lets you access all Financial Report formats for all Companies and all Divisions.
If you leave this field blank (no entry), and this security code is set up for one Company/all Divisions, then this security code lets you access all Financial Report formats for all Divisions within that Company.
We recommend that your administrator assign (map) the format IDs to each financial report security ID. This administrator must have a security code with an assigned financial report security ID and have access to all Companies/all Divisions and all Financial Report formats, respectively.
Before you use this option, we recommend that you print a listing of your eCMS security files for the General Ledger and Accounts Receivable Application Codes. This helps you determine additions, deletions and/or adjustments to your existing security setup, and can be done using the Print Security File Parameters option on the Application Installation menu. .
To map format IDs to Financial Reports Security IDs, use the F/R Security ID File Maint. option on the General Ledger File Maintenance menu.
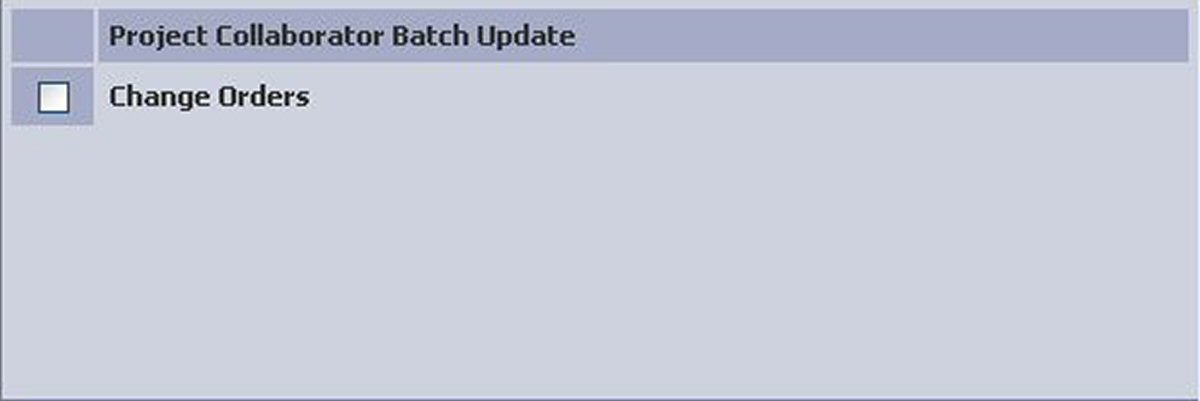
Project Collaborator Batch Update
Select this option to allow the user to process Project Collaborator Change Order updates
Miscellaneous Range Settings
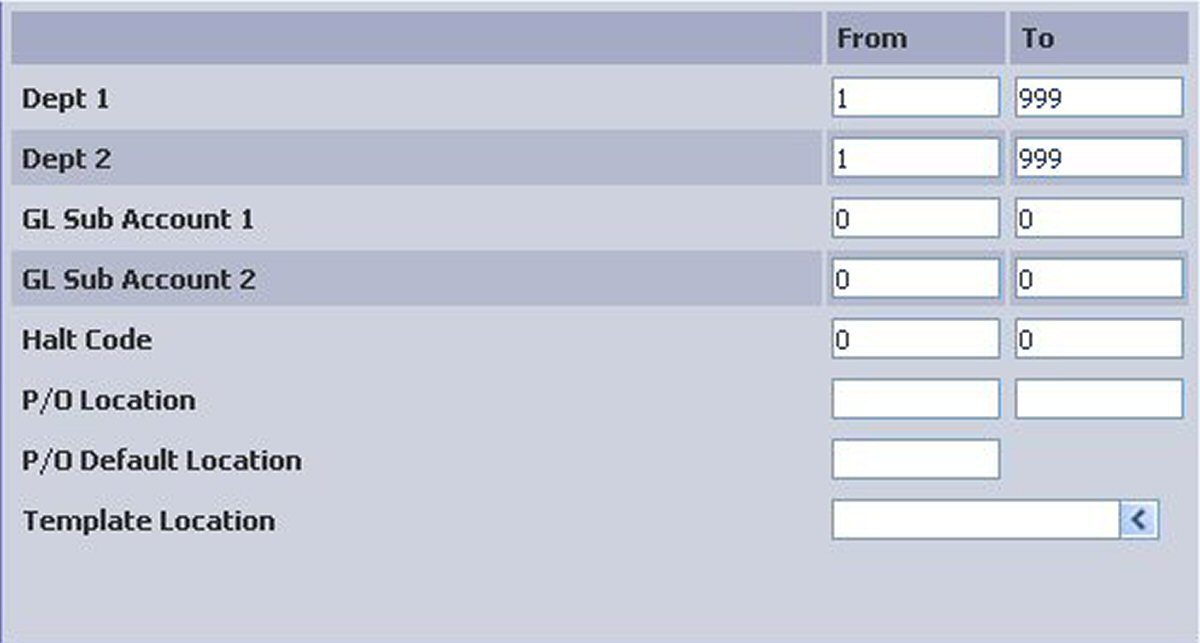
Dept 1/Dept 2
Use the From/To fields to define a range of Department security ranges to associate with this user.
GL Sub Account 1/GL Sub Account 2
A Sub Account is the General Ledger Segment (Group) designated as the sub account in the "System Wide Settings" default values.
Enter ranges to restrict the user to specific departments or cost centers.
Halt Codes
Use the From/To fields to define a range of Halt Codes the user will be allowed to access.
P/O Location/Default Location
This field allows a range of locations to be entered in which the security code is accepted. An entry in the P/O Default Location automatically fills the Location field at the time of entry. The security feature works in conjunction with the Location Address file. Location Address Codes are used in conjunction with the Purchasing Default Implement P/O Automatic Numbering
If P/O Auto Numbering is enabled:
• Location Address Codes must be set up in order to determine which Purchase Order numbers are assigned to each location.
• A Location Code must be used during Purchase Order entry.
Note By establishing a Default Location code for each user in the security set up, this code will then automatically default into the Purchase Order Entry screen. Users may be limited to a range of locations they are authorized to use in the security file set up. The Location Code can be changed during Purchase Order Entry, but only to a Location Code the user is authorized to use (Zero is a valid location).
Template Location
Templates are used by eForms to provide a standard form on which to overlay data during the generation of documents.
A Template Location is a department, or other organizational unit, below the Company/Division level which requires a template different from that used by the rest of the Company/Division.
Job Security
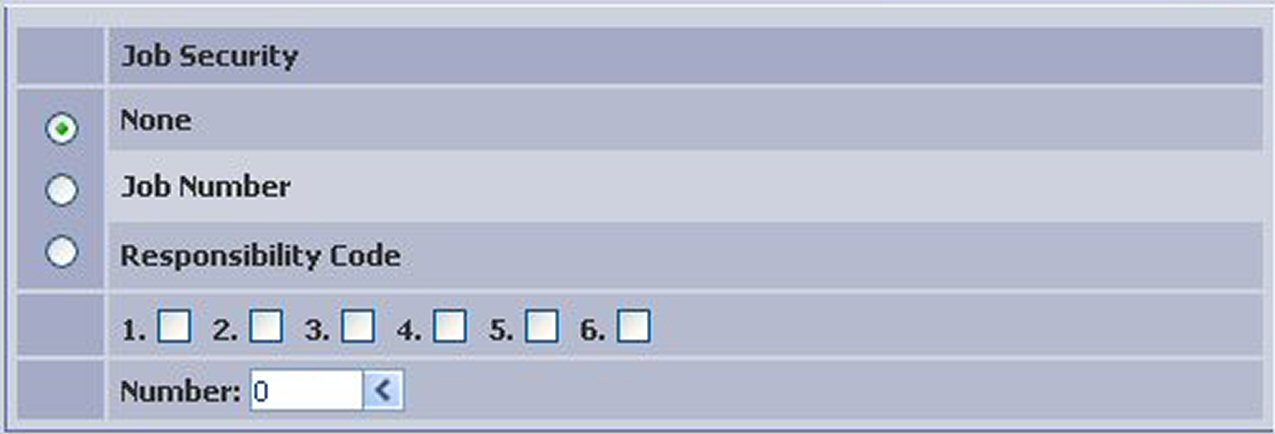
None
This User will not have any Job/Sub Job access.
Job Number
Clicking OK with this option selected will open a screen list all Jobs and Sub Jobs for the current Company/Division. Job access will be restricted to the Job/Sub Jobs selected on this screen. If no selections are made, this user will have access to all Job/Sub Jobs in this Company/Division.
Responsibility Code/Number
Using this option will grant access to jobs based on the Responsibility Codes selected here and in the Job Description files of the individual Job/Sub Jobs.
The responsibilities associated with each number default to the following list, but can be reassigned in the Company Name defaults (page 2).
• Engineer
• Project Manager
• Estimator
• Architect
• Superintendent
• Safety Engineer
Select one of these Job Security options for this user. If the Responsibility Code option is selected, it will also be necessary to designate which responsibilities the user can assume.
Number
This entry refers to a number set up for records in the Job Description Names file, which assigns Job Responsibility Types to users and lists their contact information. See the Job Costing User Guide for more information.
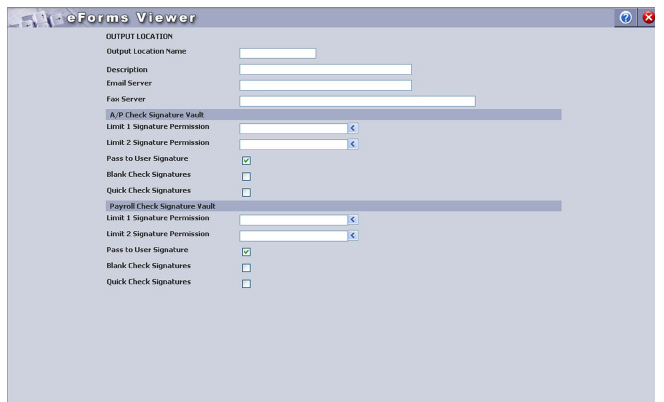
A/P and Payroll Check Signature Vault
These sections are used to assign the user the check signing permissions required to run Accounts Payable and/or Payroll checks. The check limits, set up in the individual Bank Account Masters, determine the signature to be used for various check amounts. The permission records, set up in the "Signature Vault Setup", are required by the Bank Account Masters and assigned to those users allowed to run checks on those accounts.

Limit 1 and 2 Signature Permission
Accounts Payable and Payroll Bank Account masters are set up to require that a user be granted specific Limit 1 and Limit 2 Signature Permissions in order to run checks. Assign Signature Permissions to this user by entering the Permission ID, or click the prompt to select from a list. Permission records must be currently set up in the Signature Vault (see “Signature Vault Setup”.
Blank Check Signatures/Quick Check Signatures
Select these options to grant this user permission to run these types of checks. When they meet the Signature Vault processing criteria, Blank Checks will only use the Limit 1 Signature since their amount is unknown.
PREVIOUS
Click![]() to return to the "User Profile Company/Division
Selection screen".
to return to the "User Profile Company/Division
Selection screen".
OK
Click![]() to
return to the "User Profile Company/Division Selection screen".
to
return to the "User Profile Company/Division Selection screen".
The Signature Vault provides secure access to the signature images eForms uses during A/P and Payroll check runs, and determines when they will be used and by whom. From the set up of your Bank Account Masters, Print Routing Records, Output Locations, and User Profiles you’ll be able to determine who will be authorized to run checks that are signed, the dollar amounts above which more than one signature is required, or no signature is allowed. You’ll have the flexibility to run checks for a given job site either signed or unsigned, run your A/P checks differently than your Payroll checks, and use different signatures for different companies and accounts.
User Determinations
Two factors determine if a check will be signed and with which signature.
• The permissions granted to the User.
• The dollar amount of the check.
Prior to setting up the Signature Vault you’ll need to make a few determinations concerning User Permissions and the check dollar amounts that will require additional, or different, signatures. Check limits are useful if you want to have checks with higher dollar amounts require a different signature, or merely an additional signature.
Signature Image Files
The “signatures” that print on your checks are actually image files that may contain multiple signatures. When you print a check, you can use the check’s dollar amount to determine which image, if any, will be used. The Signature Vault allows for two such “upper” limits, which are evaluated when the necessary User Permission exists to run signed checks.
Signature image files can be stored at any shared location on your network server.
There is no upper or lower limit governing the size of the images. However, if you will be using the default templates supplied by CGC you should limit the size to 1308 x 706 pixels.
The Signature Selection Process
During a check run, the system fill find the following for each check:
• A Print Routing record
• An Output Location (if one was assigned to the users profile).
• A User Security by Company/Division Detail record
Note Specifying an Output Location on a User Profile is optional, however Output Locations can be used to grant Signature Permission only when one has been assigned to the person printing checks.
Using these records, the system will find the permission granted and compare it to the permission required for the signature entered on the Bank Account Master.
A check will be signed when the permission granted the user matches the permission required to use the signature specified by the Bank Account on which the check is drawn. If the permissions do not match, checks will still be printed but will not be signed.
Setting up the Signature Vault
The following list shows the Signature Vault properties that need to be set up, the order in which to do so, and the menu paths to their setup locations. These properties, and their setup procedures, are discussed in greater length in their respective User Guides.
1 Create Permission Records and Signature Records
System Administration | Application Installation | User Administration Security Administration - Signature Vault option
2 Update the A/P Bank Account Master
Accounts Payable | File Maintenance | Bank Account Master - eForms option
3 Update the Payroll Bank Account Master
Accounts Payable | File Maintenance | Employer Bank Account Master
- eForms option
4 Update Print Routing records
eForms Application - Print Routing option
5 Update Output Locations
System Administration | Application Installation | User Administration
Output Locations
6 Update User Profiles (with Output Locations)
System Administration | Application Installation | User Administration | Security Administration - User Set Up option (Select name)
7 Update User Profiles (with Permissions, by Company/Division)
System Administration | Application Installation | User Administration Security Administration - User Set Up option
Select name, click Companies tab, click Detail
Creating Permission and Signature records
The signatures that print on your checks are actually image files that can, in fact, contain multiple signatures.
Permission and Signature records:
• Assign permissions to the signature images.
• Assign signature images to the Company/Divisions to which they apply.
To access the Signature Vault
1 On the Main Menu, click System Administration, select Application Installation, select User Administration, and then click Security Admin.
2 Click
![]() .
.
3 The
Signature Vault displays on the Permissions tab (the tab for the currently
selected screen will display out of focus![]() ).
).
Permission Records
Permission Records will comprise the prompt options available on the Signature Records screen and are used to grant access to the signature images. Each record consists of a record name and description, with the name serving as the Permission ID.
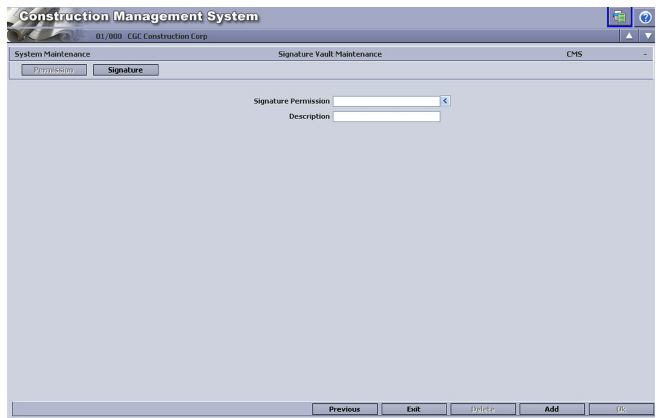
Create a Permission Record
1 Enter a name for the new record in the Signature Permission field. This name will serve as the Permission ID during Signature Vault processing.
2 Enter a description.
3 Click![]() .
.
Modify a Permission Record’s Description
1 Click the Signature Permission prompt and select a record from the list.
2 Edit the description as needed.
3 Click![]() .
.
Note To modify the Signature Permission “name”, you will need to delete this record and create a replacement.
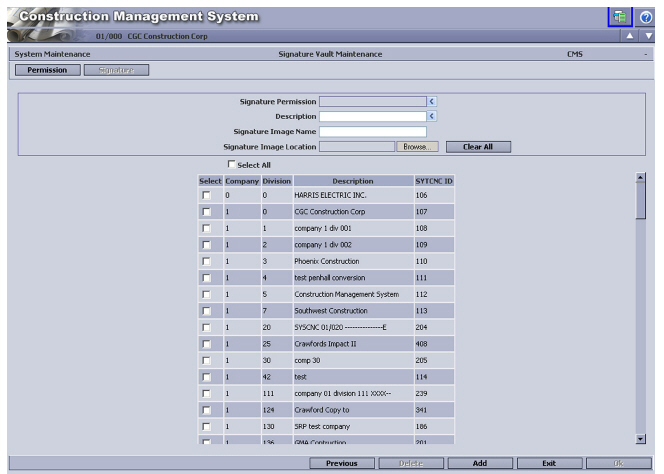
Signature Records provide the actual links to the Signature Vault’s signature images and contain the permission needed to print the signature on a check. When you create a Signature Record, you assign it to a Permission Record using the Signature Permission field. You can assign multiple Signature Records to each Permission Record. By assigning a Signature Record to a Permission Record, you are actually associating its signature image file with a Permission ID. When this Permission ID is present during a check run, eForms will use this association to grant access to the signature image files of any Signature Records assigned to that Permission ID.
A/P and Payroll Bank Account Masters also create an association with Signature Records when they specify the signatures required to draw on their individual accounts. See those User Guides for information on setting the Signature Vault fields for Bank Account Masters.
Create a Signature Record
1 Click the Signature tab.
2 Click the Signature Permission prompt and select a record from the list. The selected Permission Records description will display to the right of the field.
3 Enter a description for this record. The record will take its name from this description.
4 Enter the name of the Signature Image file to be used with this record.
5 Click
![]() , navigate to the Signature Image file location,
and double-click on the filename.
, navigate to the Signature Image file location,
and double-click on the filename.
6 Select the Companies/Divisions that will use this Signature Record, or select the entire list with the “Select All” option.
7 Click![]() .
.
Modify a Signature Record
1 Click the Signature tab.
2 Click the Description prompt and make a selection from the list. The Signature Record fields will autofill with the current values for this record.
Make the desired changes, and then click![]() to save this record.
to save this record.
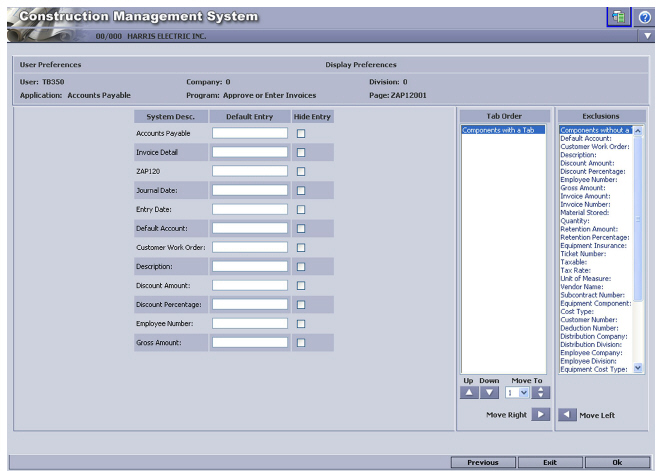
The Preference Administration screen is used to change a description, hide fields, set any required fields, set fields to display only, and is also where default entry and tab orders are set. Preferences are set on either a system-wide or a Company/Division-wide basis. Each user can enter their own preference on whether they would like to hide a field, what is the default entry, and how the tabs are ordered.
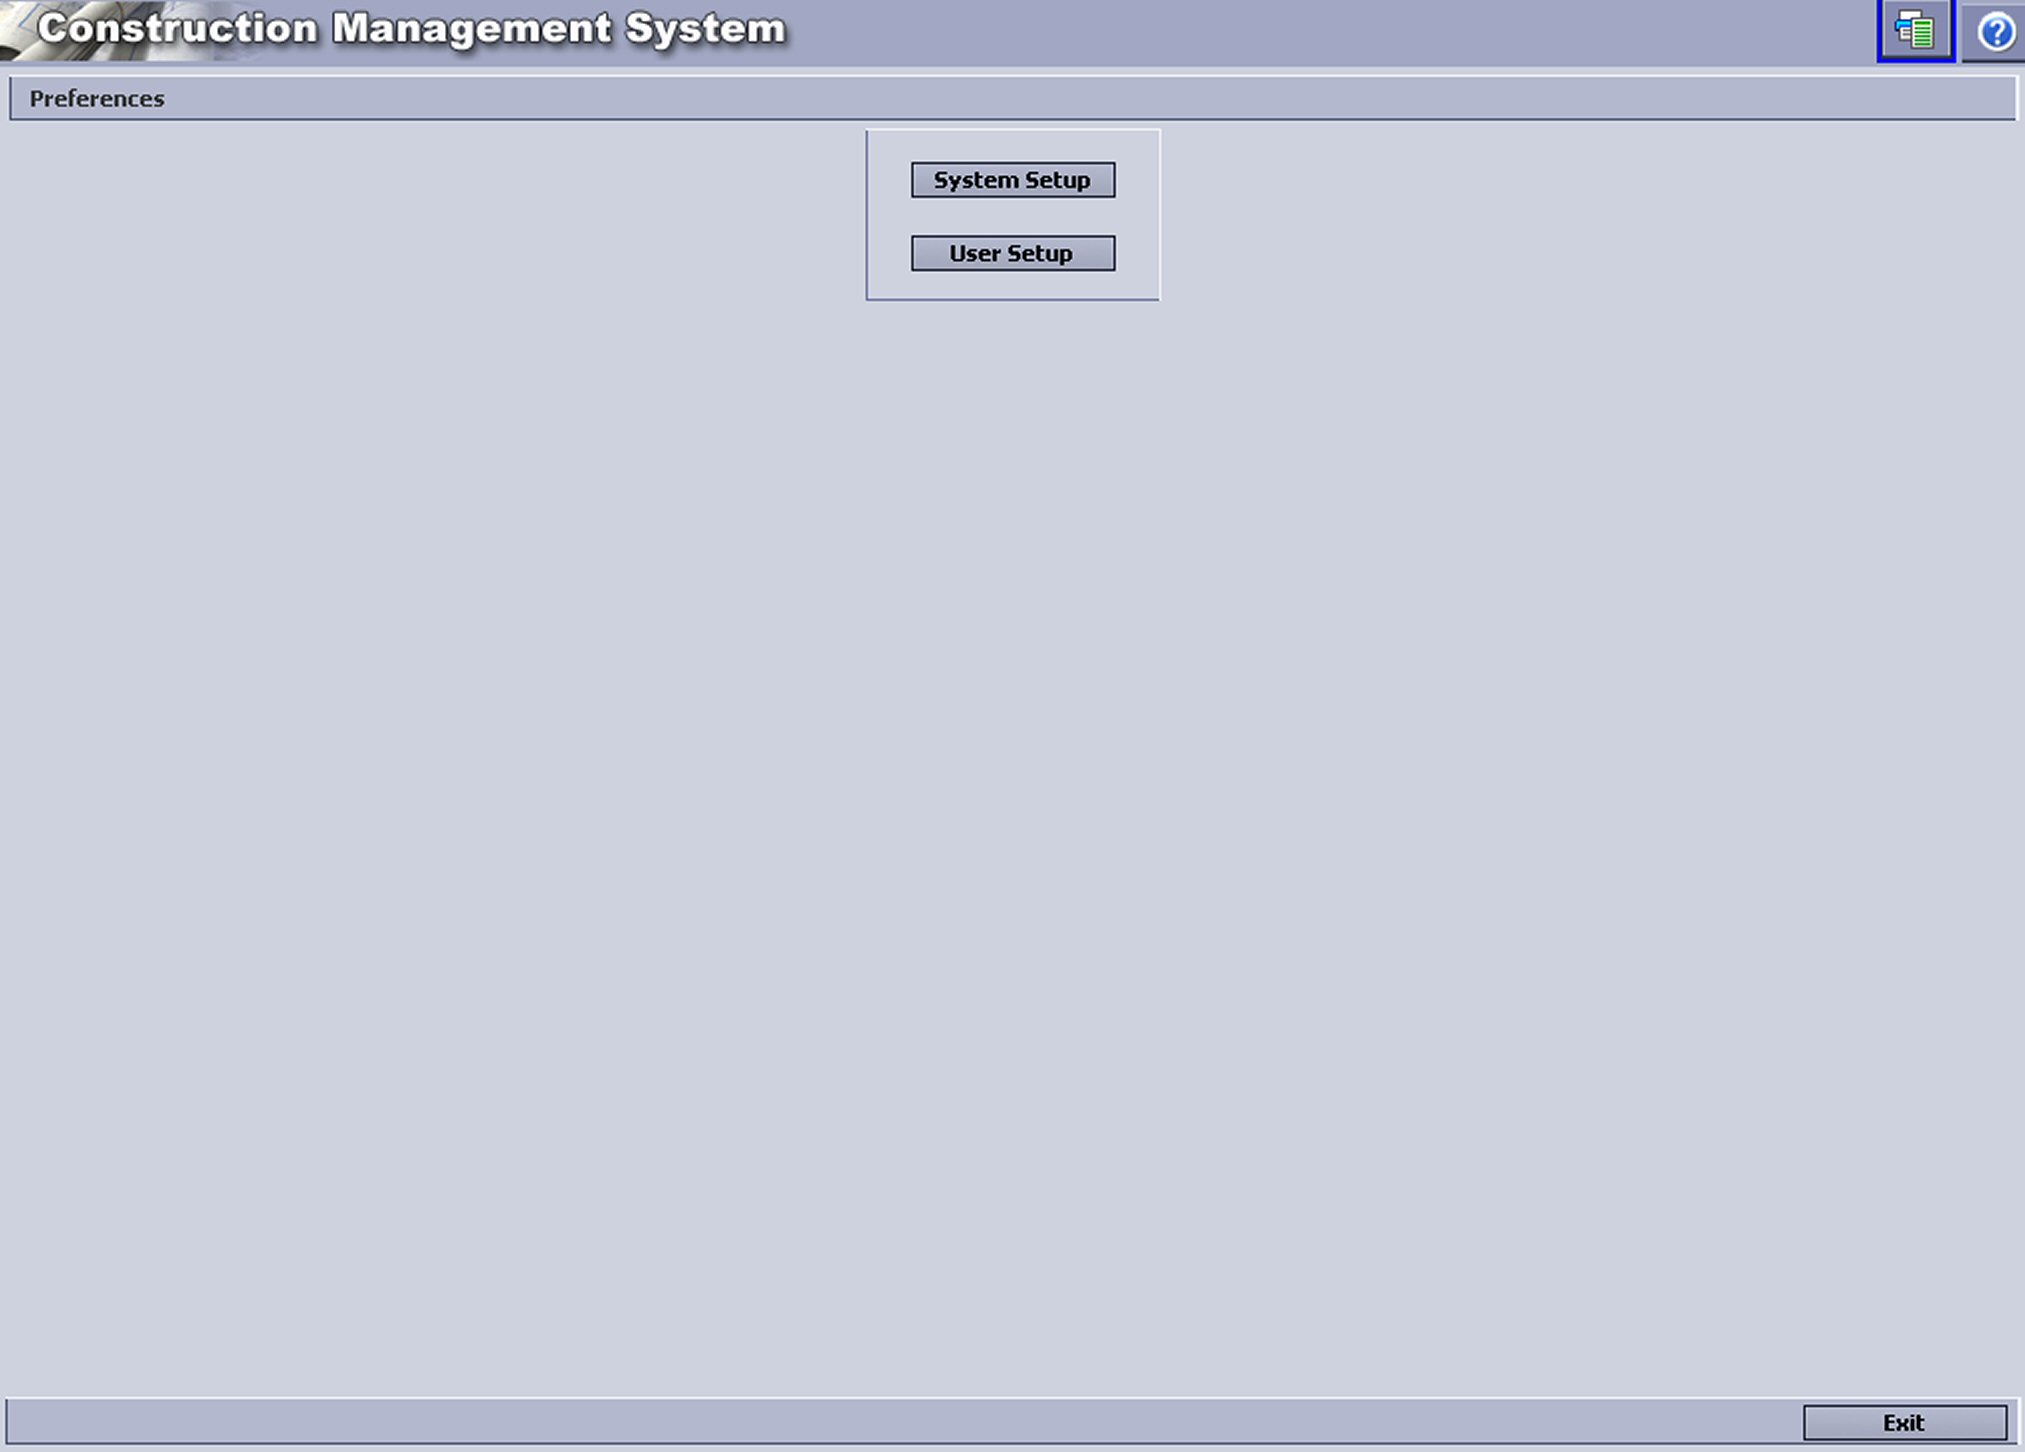
System Setup
Select to assign System wide application and program permissions.
User Setup
Select to assign User specific application and program permissions.
Note A new user cannot configure a user setup unless their User profile already exists.
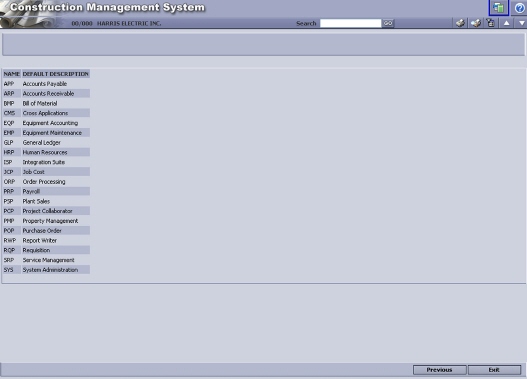
System Application Setup screen
Locating an Application
There are three methods available to locate an Application.
Vertical Scroll arrows
Click the![]() up/down arrows
to page through the list.
up/down arrows
to page through the list.
Search
Enter an Application name, or partial name, in the search field and click Go. The list will display Application names containing the value entered.
Filter
Click the Filter icon![]() to reposition
the list according to user-defined search criteria.
to reposition
the list according to user-defined search criteria.
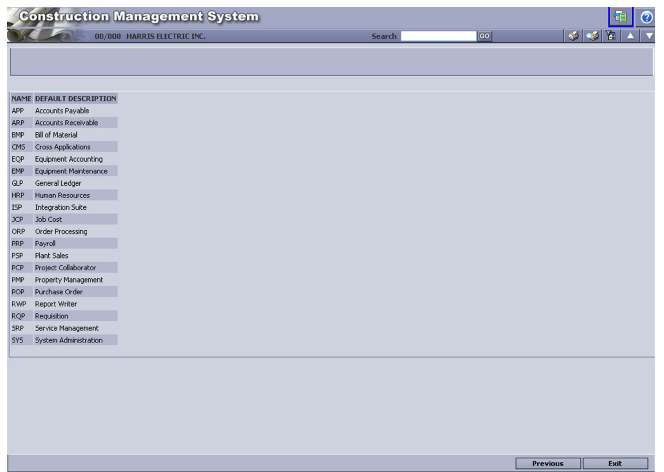
Name/Default Description
This list shows all available applications and the default description for each application. Click on any of the listed applications to access the "Application Procedure Selection screen".
PREVIOUS
Click ![]() to
return to the "Preferences Administration screen".
to
return to the "Preferences Administration screen".
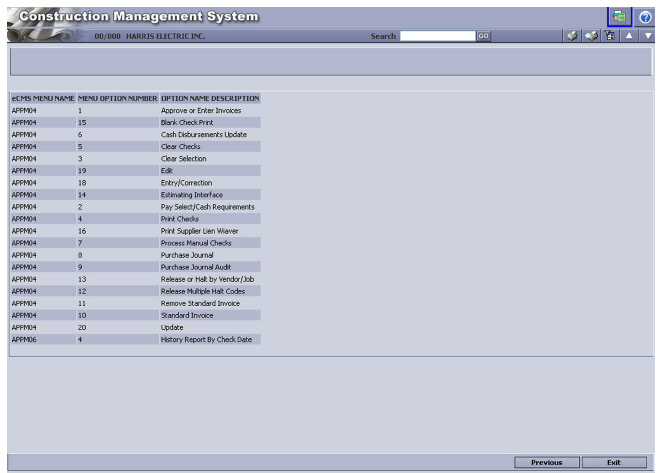
Application Procedure Selection window
Locating a Program
There are three methods available to locate a Program.
Vertical Scroll arrows
Click the![]() up/down arrows
to page through the list.
up/down arrows
to page through the list.
Search
Enter a Program name, or partial name, in the search field and click Go. The list will display Program names containing the value entered.
Filter
Click the Filter icon![]() to reposition
the list according to user-defined search criteria.
to reposition
the list according to user-defined search criteria.
Program Name/Option Name Description
Click to display the "Application Procedure Screen Selection screen"
PREVIOUS
Click ![]() to
display the "System Application Setup screen".
to
display the "System Application Setup screen".
Application Procedure Screen Selection

Locating a Program
There are three methods available to locate a Program.
Vertical Scroll arrows
Click the![]() up/down arrows
to page through the list.
up/down arrows
to page through the list.
Search
Enter a Program name, or partial name, in the search field and click Go. The list will display Program names containing the value entered.
Filter
Click the Filter icon![]() to reposition
the list according to user-defined search criteria.
to reposition
the list according to user-defined search criteria.
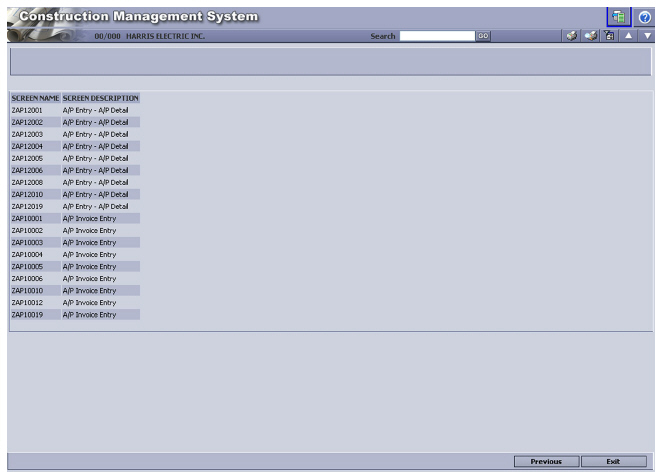
Screen Name
Click on the desired screen name to display the "Procedure Field settings - System screen".
PREVIOUS
Click ![]() to
display the "Application Procedure Selection screen".
to
display the "Application Procedure Selection screen".
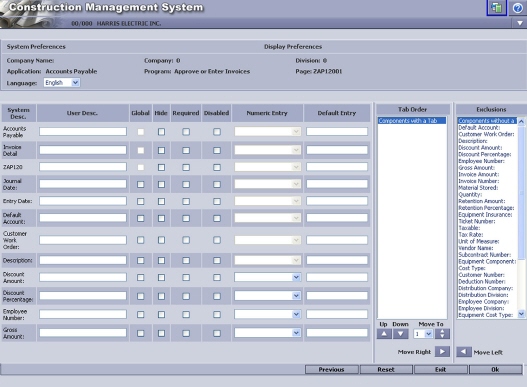
Procedure Field settings - System
Each row on this screen represents one control field that is displayed on the selected screen in the application.
Language
Click the prompt and select a language from the drop-down list. This language selection will affect the terminology used on this screen.
System Description
This is a system-defined description and cannot be changed.
User Description (Soft Label)
If you would like the system description to display a different label, you can use this field to create a custom soft label. Changing the soft label overrides the default System Description value.
Global
Select this option to update all screens currently using the System Description to use the User Description (soft label) instead.
If this option is unselected, the soft label affects only the screen you are on.
Note The Global check box only applies to the soft label.
Hide
Select this option to suppress the display of the System Description.
Required
Select this option to require the System Description to be populated.
Disable
Select this option to display the System Description, but make it inaccessible to the user.
Numeric Entry
Select this option to designate this field’s field type as numeric, for fields that can support numeric entries.
Default Entry
This value is used only in ADD mode. If this value is set for the control and the user is adding a record, then this value is displayed on the screen initially (The user CAN override this value). This is not displayed for Boolean or date type fields.
Tab Order
The Tab Order section is used to set the tabbing order
for selected fields. To set the tabbing order of a field, highlight it
and use the ![]() arrow to move it from the Exclusions column to the Tab Order column. Use the
arrow to move it from the Exclusions column to the Tab Order column. Use the![]() arrows
to adjust the fields position relative to the others in the list.
arrows
to adjust the fields position relative to the others in the list.
PREVIOUS
Click ![]() to
return to the "Application Procedure Screen Selection screen" without
saving these entries.
to
return to the "Application Procedure Screen Selection screen" without
saving these entries.
OK
Click![]() to
complete the System Preferences Setup and save these entries.
to
complete the System Preferences Setup and save these entries.
Locating an Application
There are three methods available to locate an Application.
Vertical Scroll arrows
Click the![]() up/down arrows
to page through the list.
up/down arrows
to page through the list.
Search
Enter an Application name, or partial name, in the search field and click Go. The list will display Application names containing the value entered.
Filter
Click the Filter icon![]() to reposition
the list according to user-defined search criteria.
to reposition
the list according to user-defined search criteria.
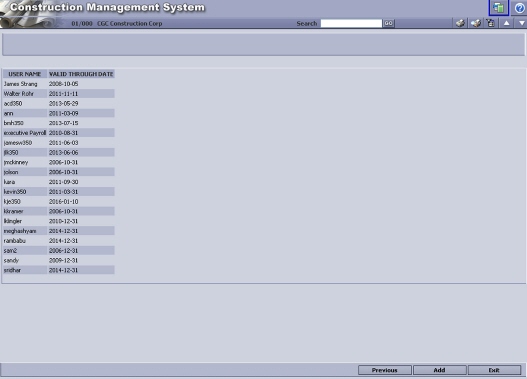
Name/Valid Through Date
This list shows all available applications and the default description for each application. Click on any of the listed applications to access the "Application Procedure Selection screen".
PREVIOUS
Click ![]() to
return to "Preferences Administration screen".
to
return to "Preferences Administration screen".
Application Procedure Selection screen

Locating a Program
There are three methods available to locate a Program.
Vertical Scroll arrows
Click the![]() up/down arrows
to page through the list.
up/down arrows
to page through the list.
Search
Enter a Program name, or partial name, in the search field and click Go. The list will display Program names containing the value entered.
Filter
Click the Filter icon![]() to reposition
the list according to user-defined search criteria.
to reposition
the list according to user-defined search criteria.
Program Name/Option Name Description
Click to display the "Application Procedure Screen Selection screen"
PREVIOUS
Click ![]() to
display the "User Application Setup screen".
to
display the "User Application Setup screen".
Application Procedure Screen Selection
Locating a Screen name
There are three methods available to locate a specific Screen name.
Vertical Scroll arrows
Click the![]() up/down arrows
to page through the list.
up/down arrows
to page through the list.
Search
Enter a Screen name, or partial name, in the search field and click Go. The list will display Screen names containing the value entered.
Filter
Click the Filter icon![]() to reposition
the list according to user-defined search criteria.
to reposition
the list according to user-defined search criteria.
Screen Name
Click on the desired screen name to display the "Procedure Field Settings - User screen".
PREVIOUS
Click ![]() to
display the "Application Procedure Selection screen".
to
display the "Application Procedure Selection screen".
Procedure Field Settings - User screen
System Description
This is a system-defined description and cannot be changed.
Default Entry
This value is used only in ADD mode. If this value is set for the control and the user is adding a record, then this value is displayed on the screen initially (The user CAN override this value). This is not displayed for Boolean or date type fields.
Hide
Select this option to suppress the display of the System Description.
Tab Order
The Tab Order section is used to set the tabbing order
for selected fields. To set the tabbing order of a field, highlight it
and use the ![]() arrow to move it from the Exclusions column to the Tab Order column. Use the
arrow to move it from the Exclusions column to the Tab Order column. Use the![]() arrows
to adjust the fields position relative to the others in the list.
arrows
to adjust the fields position relative to the others in the list.
PREVIOUS
Click ![]() to
return to the "Application Procedure Screen Selection screen" without
saving these entries.
to
return to the "Application Procedure Screen Selection screen" without
saving these entries.
OK
Click![]() to
complete the User Setup and save these entries.
to
complete the User Setup and save these entries.
When executing a distribution, eForms must determine which template to apply, as well as the e-mail or fax server to which the distribution should be sent. These determinations are made using Output and Template Locations. A Template Location is one of the criteria eForms uses when selecting the template to be used for a distribution. An Output Location is used to determine the e-mail or fax server where the distribution will be sent. The following procedures show how to set up records for both of these properties.
Note See the Print Routing section of the eForms User Guide for details on how to direct a distribution to a specific printer.
eForms is shipped with default Output and Template locations, called DEFAULT, that can be deleted. However, eForms requires that at least one Output and Template location remain set up.
An Output Location refers to the physical location of an e-mail server, or fax server. When set up, they show eForms where, and how, to direct a distribution. In addition to assigning Output Locations to templates, you can also assign them to individual users. If, for example, you work at more than one location, you can change the fax server to which your faxes are sent by changing the Output Location entry in your User Profile (see "Associate a User with an Output Location".
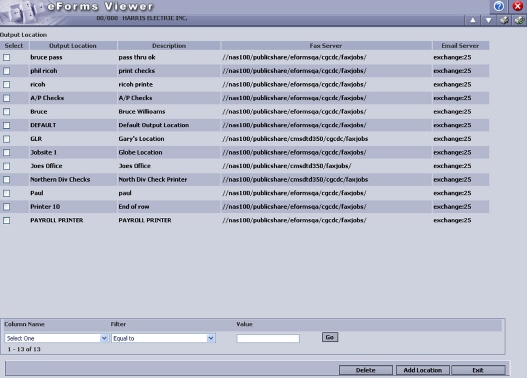
Adding an Output Location screen
To add an Output Location
1 On the Main Menu, click System Administration, select Application Installation, select User Administration, and then click Output Locations.
2 Click
![]()
3 On the ensuing screen:
• In the Output Location field, enter the name you will use to identify this location.
• In the Description field, enter a brief description to further identify the location.
• Click the Print Server field prompt and select the printer alias used to identify your print server. For more information, see the Printer Aliases section of the eForms User Guide.
• In the Fax Server field, enter the network folder used for your fax server.
• In the Email Server field, enter the name used to identify your e-mail server.
The Signature Vault properties for an Output Location record are used to grant permission to signature images based on the Permission ID entries made in the Limit 1 Signature Permission and Limit 2 Signature Permission fields.
The Output Location record selected by eForms will match the User ID of the person running check and the Output Location specified on that persons User Profile.
A signed check run will occur when that Output Location record contains the signature permissions required to use the signature images specified by the Bank Account on which the checks will be drawn.
If you would rather have Signature Permissions evaluated at the User ID level, select Pass to User Signatures and leave the Limit 1 Signature Permission and Limit 2 Signature Permission fields blank.
Note It is not possible to modify an existing Output Location record. To incorporate values for the Signature Vault properties, it will be necessary to delete the current record and create a new one.
Limit 1 Signature Permission / Limit 2 Signature Permission
When the Output Location assigned to the User Profile of the person running the checks matches that contained in an Output Location record, these fields will grant access to the selected signature image. A Permission ID is used to reference the signature image file designated by a Signature Record (see "Signature Records"). This signature image file must be the one required by the Bank Account on which the check will be drawn in order for a signed check run to occur.
Pass to User Signature
This option passes the Signature Selection process to the User level. When selected, you must also leave the Limit 1 Signature Permission and Limit 2 Signature Permission fields blank. On Output Location records, this option defaults to “unselected”.
Blank Check Signatures / Quick Check Signatures
When selected, these fields indicate that checks of these types should be signed when:
• This Output Location record is selected by eForms
• The necessary Signature Permissions exist.
Note When they meet Signature Vault processing criteria, Blank Checks will only use the Limit 1 Signature since the amount of the check is unknown.
Associating Users or Jobs with an Output Location
After an Output Location has been set up it can be assigned to individuals through their User Profile. You can also designate an Output Location to handle payroll processing for a Job/SubJob through the Job Description. These output assignments will become important during the printer selection process because User ID and Output Location are two of the properties eForms uses when routing a print job to a specific printer (see the Print Routing section of the eForms User Guide for more information).
Associate a User with an Output Location
To designate an Output Location on a User Profile
1 On the Main Menu, click System Administration, select Application Installation, select User Administration, and then click Security Admin.
2 Click
![]()
3 Click the User Name of the profile you wish to associate with an Output Location.
4 Click the Output Location prompt and make a selection from the list. All currently setup Output Locations will be included among the selections.
5 Click
![]() to save changes and exit.
to save changes and exit.
Associate a Job/SubJob, Payroll or Accounts Payable Processing with an Output Location
To designate an Output Location on a Job Description
1 On the Main Menu, click Job Costing, select File Maintenance, and then click Job Cost Setup.
2 Enter the number of the Job/SubJob you wish to associate with an Output Location, or click the SubJob prompt to select from a list.
3 Click the Job Description option.
4 Click the General Billing tab.
5 In the Output Location section, click either the Accounts Payable prompt or the Payroll prompt, and select the Output Location you wish to assign to this Job/SubJob from the list.
6 Click
![]() to save changes, and exit.
to save changes, and exit.
7 Click
![]() to
exit without saving.
to
exit without saving.
Deleting an Output Location
• Select
the records to be deleted, and then click ![]() . eForms
requires at least one Output Location to remain set up.
. eForms
requires at least one Output Location to remain set up.
A Template Location is a department, or other organizational unit below the Company/Division level that requires a unique template.
The need to specify a Template Location would arise, for example, if a department required a logo, or text, that differed from that used by the rest of the Company, or Division. In this case, the Template Location would be the Department, and it would be linked to the required template by specifying that Template Location in the templates properties.
Important eForms requires that at least one Template Location be set up even if they will not be used.
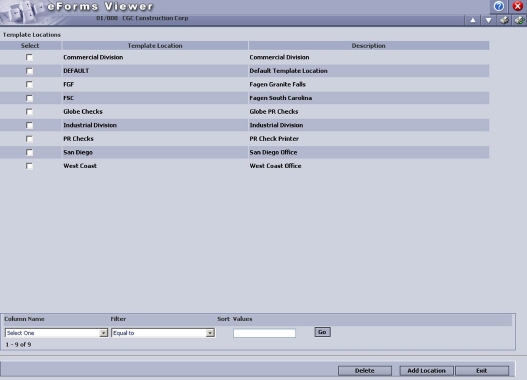
Adding a Template Location
To add a Template Location
1 On the Main Menu, click System Administration, select Application Installation, select User Administration, and then click Template Locations.
2 Click
![]()
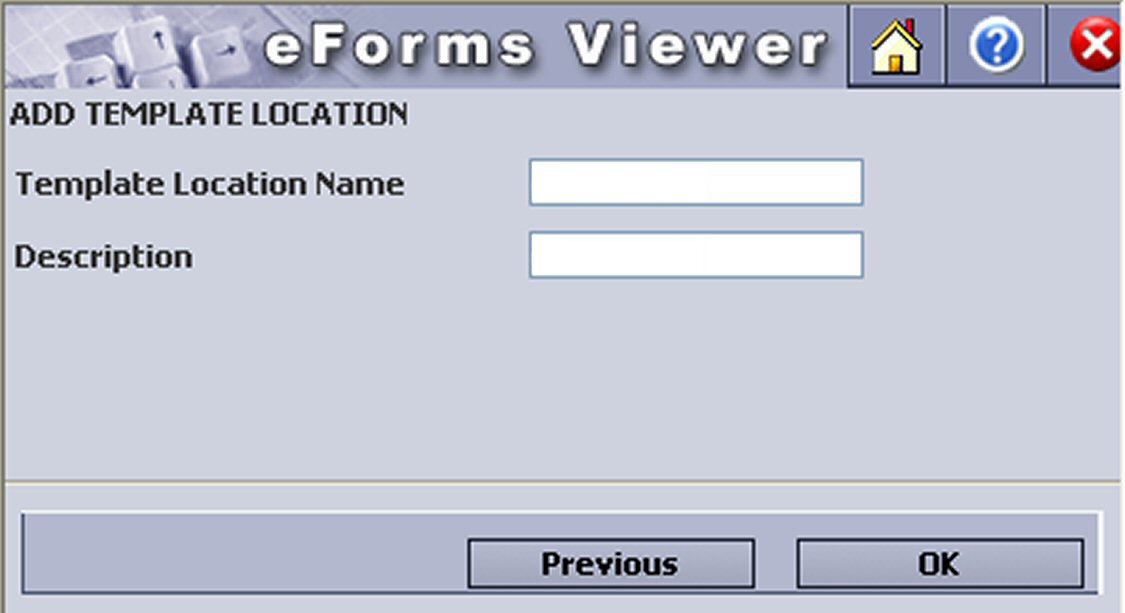
3 On the pop-up screen, provide the following information:
Template Location Name |
The department, or other unit, that requires the template. The Template Location Name is limited to 20 characters |
Description |
A brief description used to identify this location. This Description is limited to 50 characters |
Associate a User with a Template Location
After a Template Location has been set up it can be assigned to individuals through their User Profile.
To designate a Template Location on a User Profile
1 On the Main Menu, click System Administration, select Application Installation, select User Administration, and then click Security Admin.
2 Click
![]()
3 Click the User Name of the profile you wish to associate with a Template Location.
4 Click
![]()
5 Click
![]() of the Company/Division for
this User.
of the Company/Division for
this User.
6 In the Template Location field, click the drop-down prompt and select a Template Location to associate with this User from the list
Deleting a Template Location
• Select
the records to be deleted, and then click![]() . eForms
requires at least one Template Location to remain set up.
. eForms
requires at least one Template Location to remain set up.
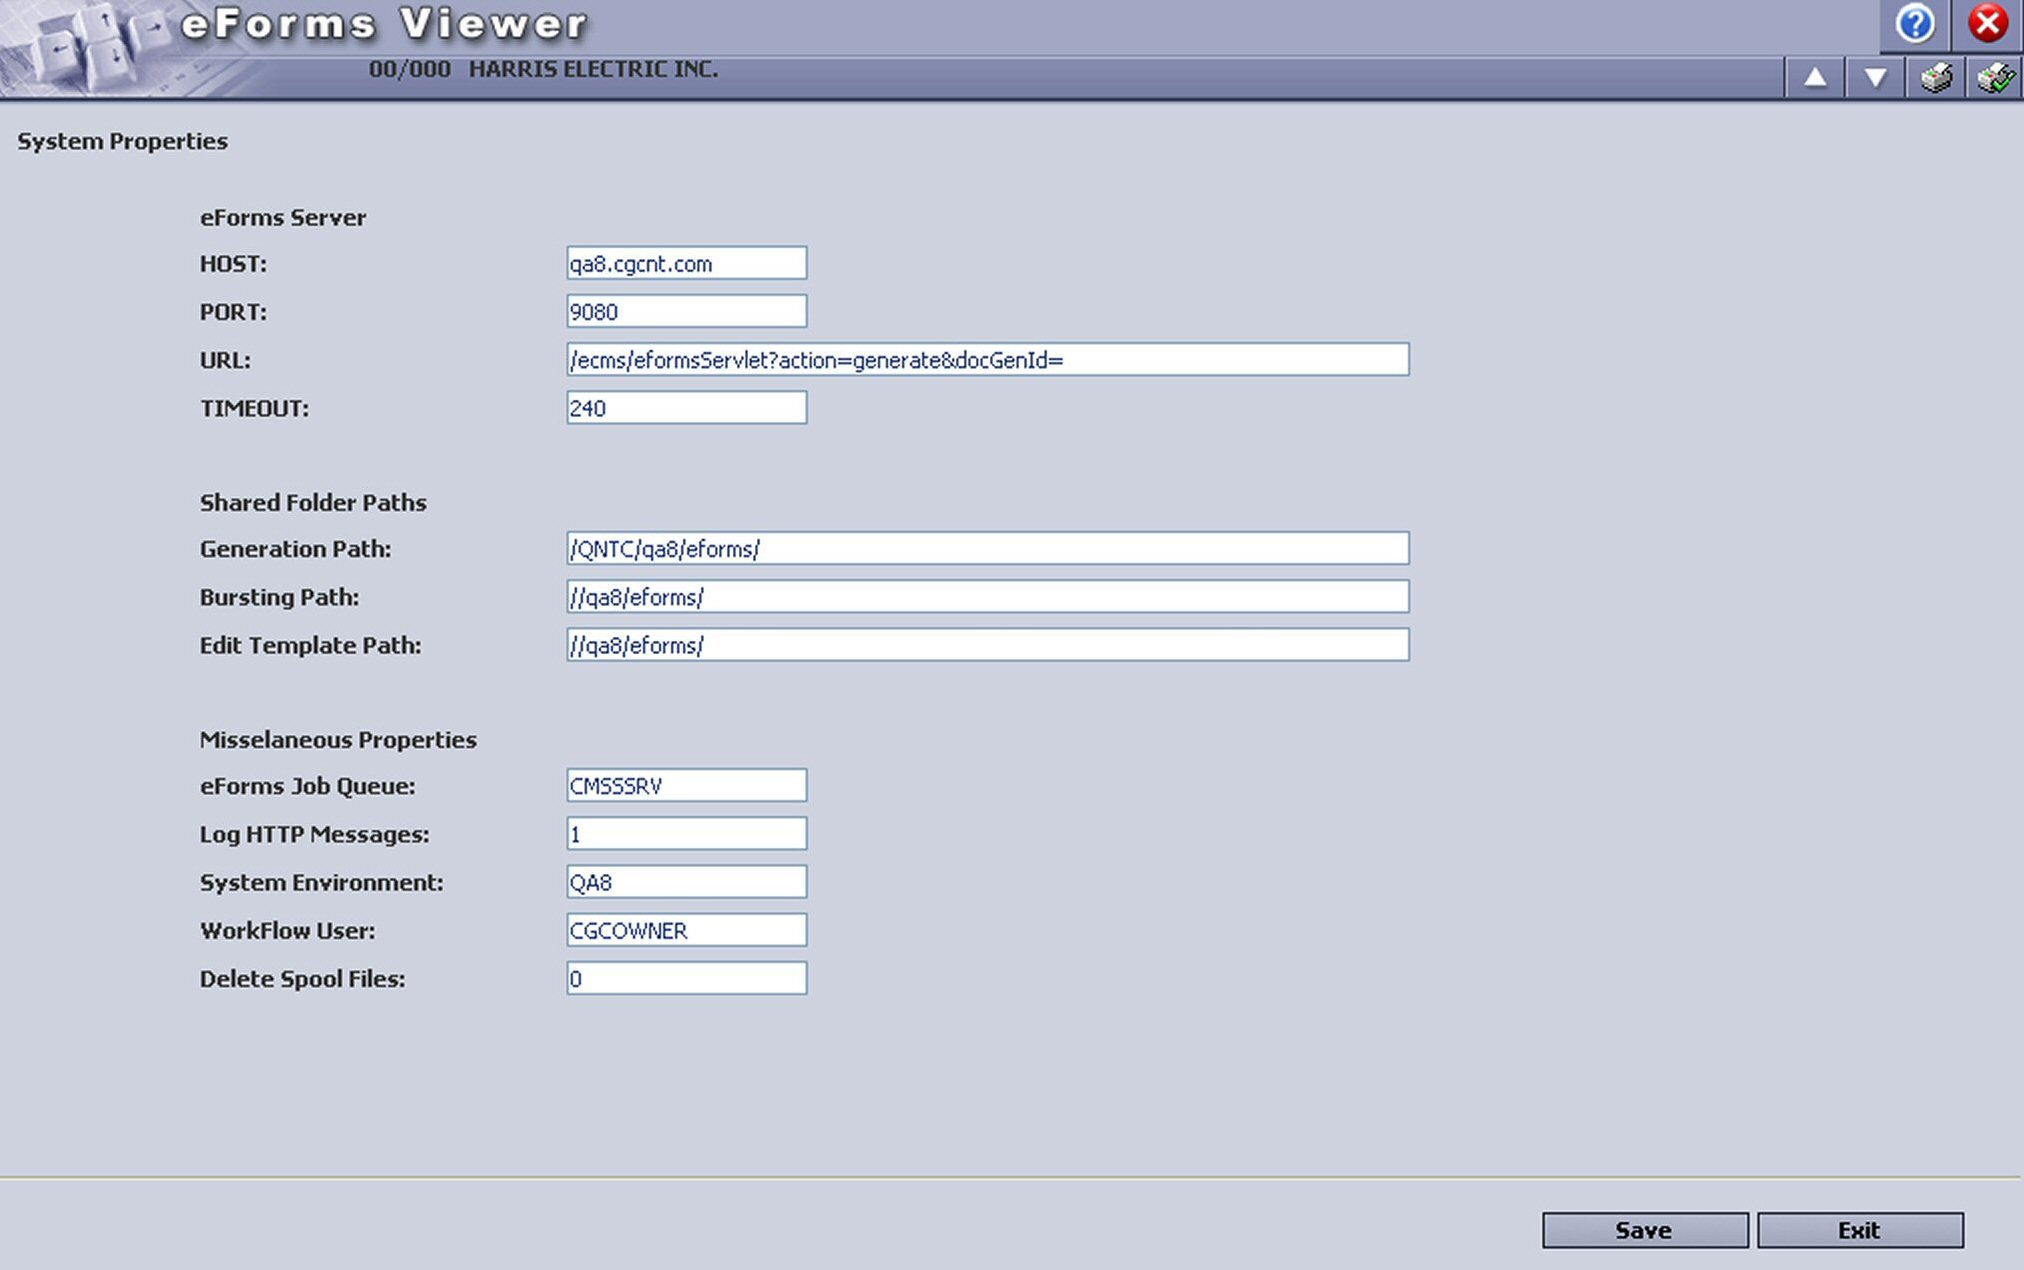
eForms System Properties are used to set the maximum number of pages allowed for e-mail and faxes, and the eForms server properties described in the table below. These properties are set up by CGC Technical Support during installation and should not be modified. Use the following table for verification purposes only.
System Administration | Application Installation | User Administration | eForms System Properties
Property |
Description |
HOST |
The Host name of the eForms Java server. |
PORT |
The Port number of the eForms Java server. |
URL |
The server URL used to call the Java bursting servlet.. |
TIMEOUT |
The length of time, in seconds, eForms will call the Java servlet. eForms will throw an error if it cannot connect before reaching the TIMEOUT. Defaults to 240. |
eForms Server
Property |
Description |
Generation Path |
The path where the generation process will stage files. This is the same on which path eFormsService is listening for files. |
Bursting Path |
The path where the Java bursting will monitor the process. This will change based on where Websphere is running (Windows or Native). |
Edit Template Path |
The path where the template edit procedure will temporarily store the working copy of a template being modified. |
Shared Folder Paths
Property |
Description |
eForms Job Queue |
The Job Queue to which the Project Collaborator documents and Workflow trigger calls are submitted. This property defaults to *DEFAULT, which in turn defaults to the user’s Job Description. CMSSSRV is the recommended setting, however this field can be set to whichever Job Queue the Customer desires. |
Log HTTP Messages |
Defaults to zero. This property should only be set to 1 when a technician needs to do advanced troubleshooting, during which a log will be maintained for all HTTP messages generated by invoking the Java bursting servlet. |
System Environment |
The SYSENV environment to be used by the WOrkflow trigger program and eForms DB2 stored procedures. It is used to make the library list available to an external connection. |
Workflow User |
The User to whom the eForm Workflow Notification is recorded. Defaults to CGCOWNER, but can be set to any eCMS User.. |
Deleted Spool Files |
• 0 - The eCMS spool file generated by eForms will not be automatically deleted. This setting is required by Formations customers. • 1 - The default setting. The eCMS spool file generated by eForms will be automatically deleted. |
Miscellaneous Properties
eForm Types refer to the variety of templates that originally shipped with eForms. Examples of eForms Types include: Purchase Orders, Paychecks, and Equipment Work Orders. Descriptions of these properties are provided in the table below, which lists the properties default behavior.
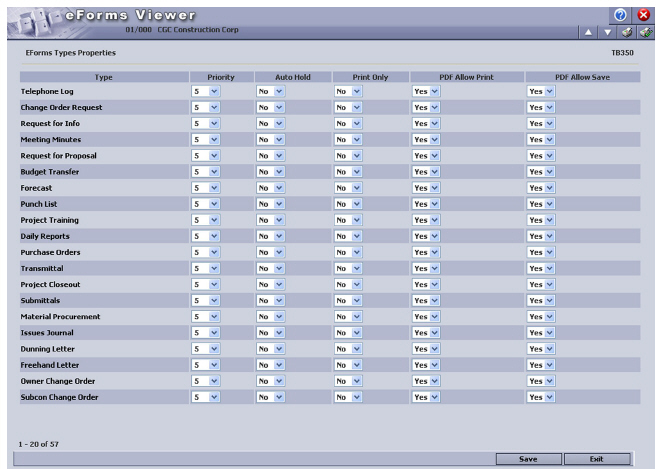
Property |
Description |
Priority |
Establishes the documents priority relative to others in the print queue. The range of possible values is 1-9. The default is 5. |
Auto Hold |
Always places documents of this type on hold regardless of print settings. The hold will occur after the bursting stage and prior to distribution. |
Print Only |
Disallows the e-mailing and faxing of this document. Its output is restricted to a printer only. |
PDF Allow Print |
Allows the viewable PDF of this document to be outputted to a printer. This may not always be advisable for reasons of security. |
PDF Allow Save |
Allows the viewable PDF of this document to be saved to disk. This may not always be advisable for reasons of security. |
This option is used to provide a listing of security parameters for an individual User Profile, or all User Profiles in a Company/Division. Details for the Company’s security setup can also be included.
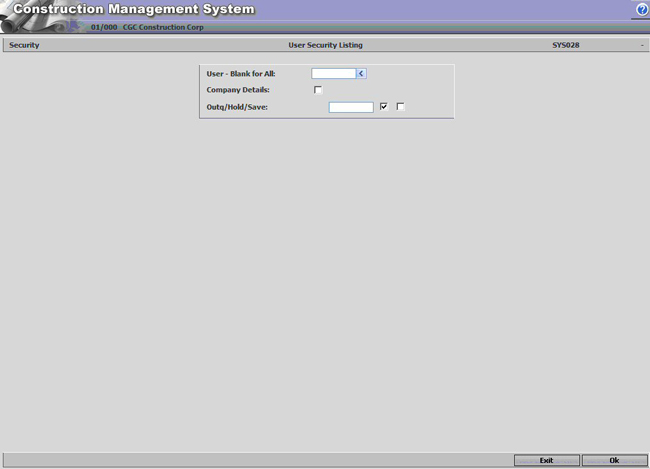
User
Enter the employee number of the User Profile to include in the report, or click the prompt to select from a list. Leave this field blank to include User Profiles Company-wide.
Company Details
Select this option to include Company security details at the bottom of the report.
Outq/Hold/Save
Enter an Outq identifier to send this report to a specific output queue. Leave this field blank to send the File Listing to the default output queue.
Select the Hold option to place this report on hold in the default, or specified, output queue.
Select the Save option to print the report, and then place it on hold in the default, or specified, output queue.
This option is used to provide a listing of Menu security parameters for an individual User Profile, or for all User Profiles in a Group.
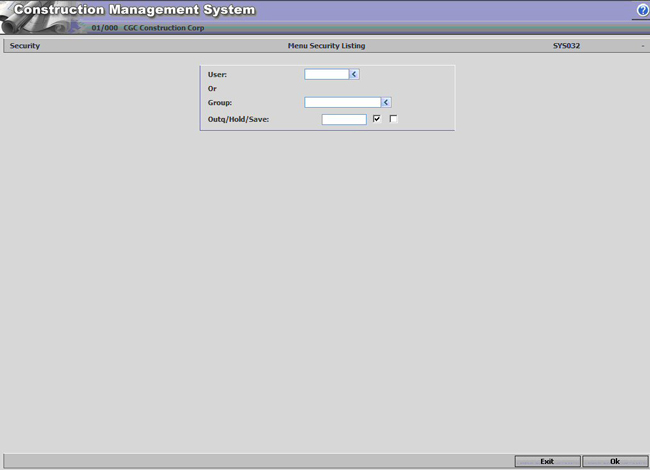
User
Enter the employee number of the User Profile to include in the report, or click the prompt to select from a list.
- or -
Group
Enter a name of the Group that will comprise the report, or click the prompt to select from a list.
Outq/Hold/Save
Enter an Outq identifier to send this report to a specific output queue. Leave this field blank to send the File Listing to the default output queue.
Select the Hold option to place this report on hold in the default, or specified, output queue.
Select the Save option to print the report, and then place it on hold in the default, or specified, output queue.
![]()
Please send
documentation corrections, feedback or suggestions to:
the CGC
Tech Pubs Team ![]()