The Union Class Master is used to enter Standard Rates for unions in association with Employee Class records.
Grouping unions by classification may be helpful if all the members of a union receive wage increases at the same time.
Note: The pay rate in this file will take precedence if a rate exists in both Employee Class and Employee Maintenance files.
Use this menu option to add, update or delete records in the Union Class file.
From the Main Menu, select Payroll, File Maintenance, and then click Union Class Master to display this screen.
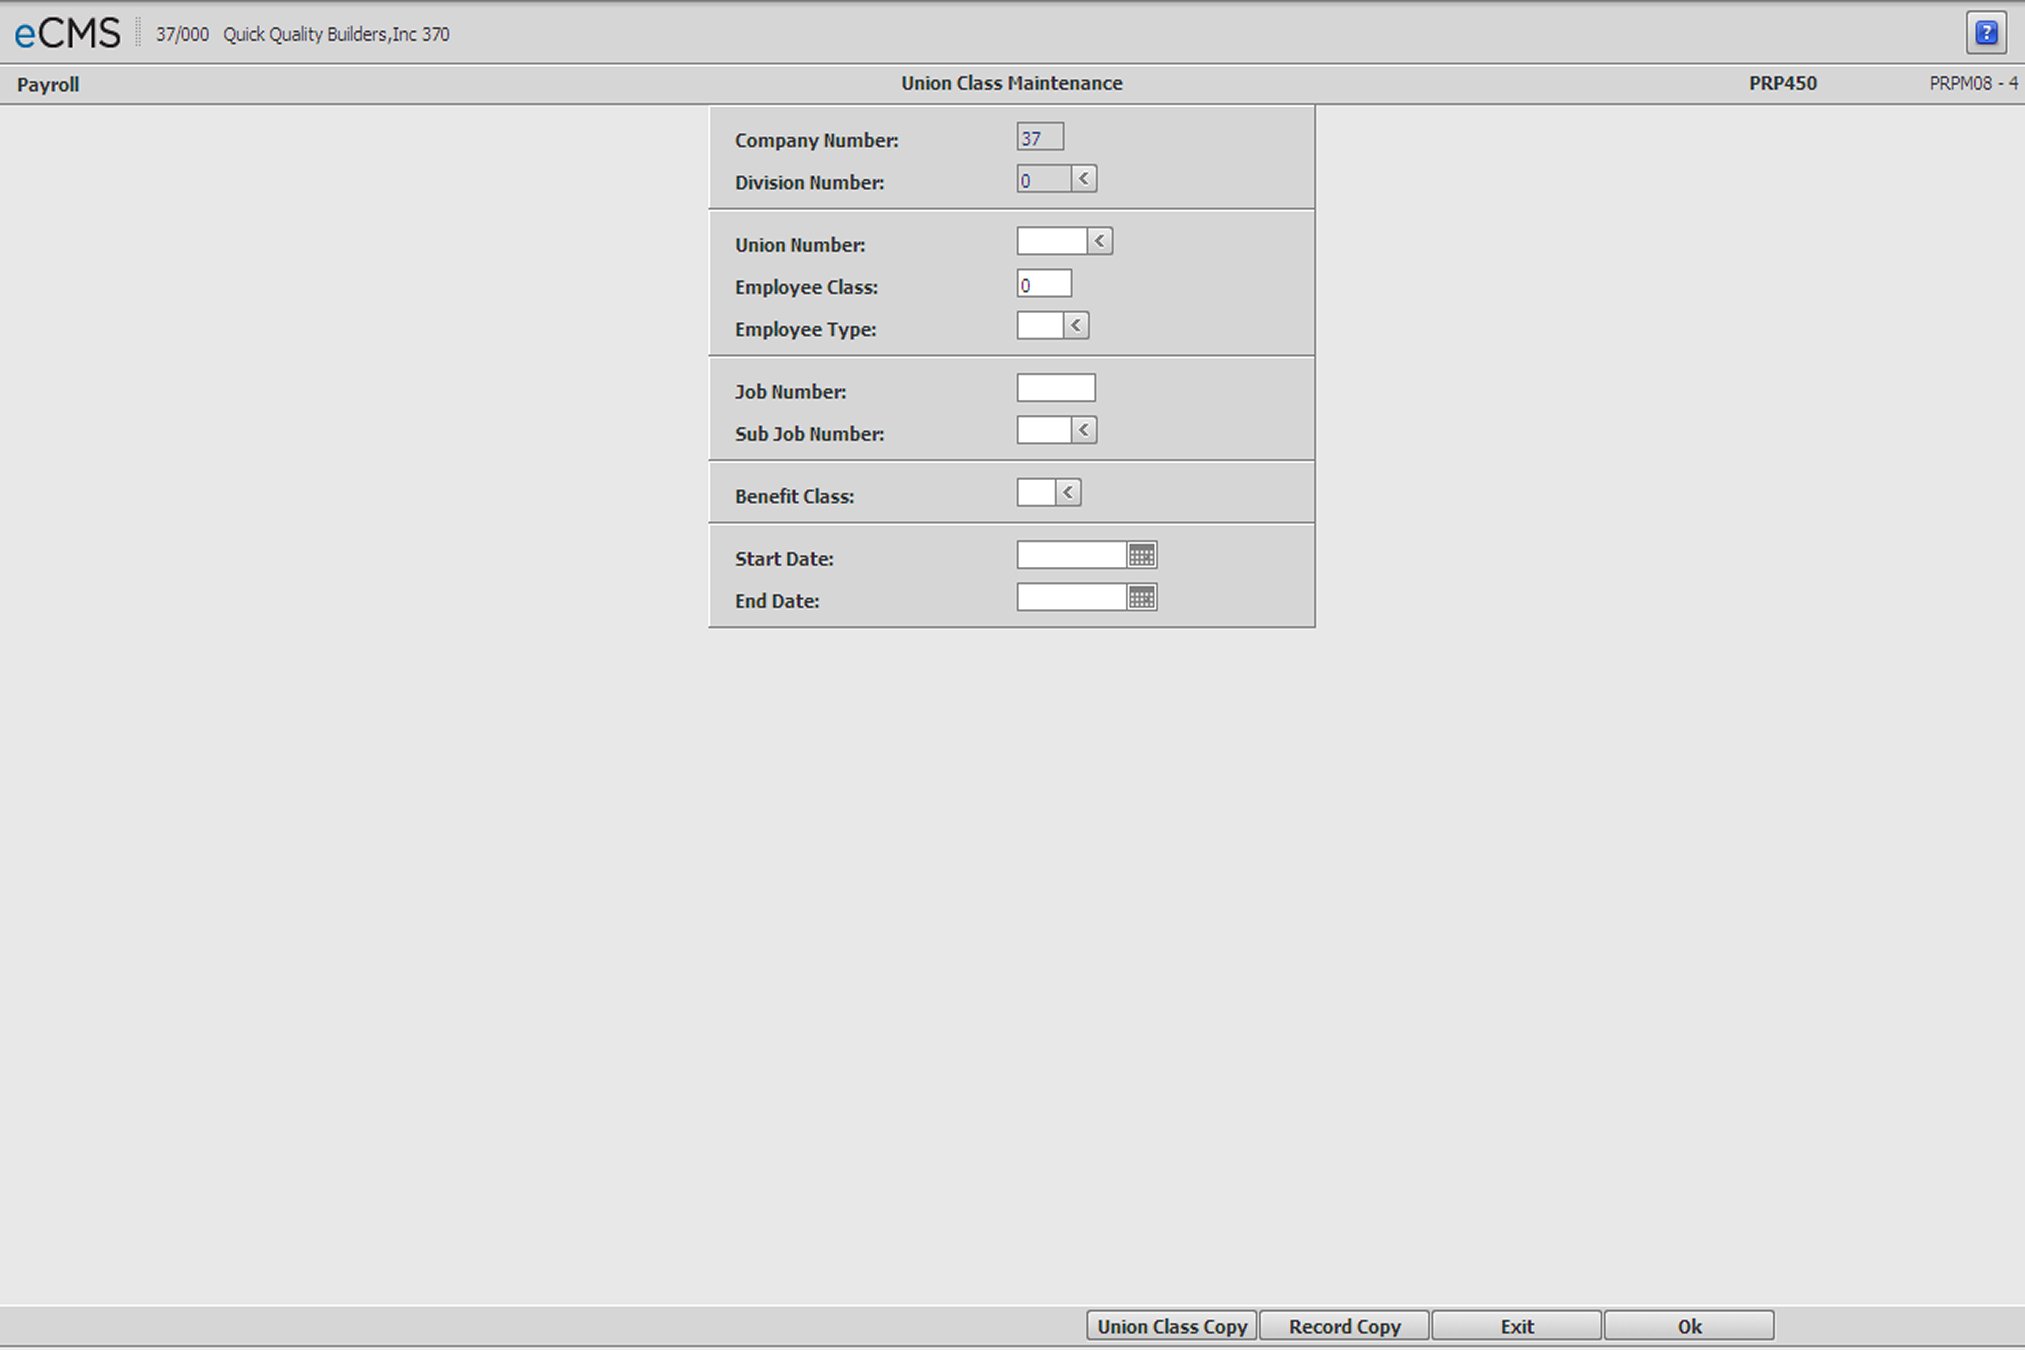
Union Class Master Selection screen
Company/Division Number
Accept the Company/Division used at login, or click the Division Number prompt to make new selections from a list.
Union Number
Enter a Union Number, or click the prompt to select from a list. This number must currently be set up in the Distribution Master and the Union Master. A code of 0 is not valid.
Employee Class
Enter an employee class code. The code can be a union number or any other selected code. (Code 0 is not valid).
Employee Type
This description is used on the Usage (EEO) Report.
If you have various types of employees within an employee class, you must build a separate record for each type.
Enter the Employee Type. This code is used to designate a type of employee within the same Employment class, such as foreman (FR), journeyman (JR), apprentice (AP), and so on.
Enter the Employee Type to create or modify, or click the prompt to select from a list.
Job/Sub Job Number
Enter a valid Job/Sub Job number if this Employee Class record applies to a specific job. Click the Sub Job prompt to make these selections from a list.
Note: Entries must be made to Employee Class and Employee Type prior to designating a Job/Sub Job.
Benefit Class
Enter the Employee Benefit Class. Employees coded with the same Benefit Class Code, in the Employee Master, will receive the hourly rate of pay entered in this file.
Start Date/End Date
If date-sensitive pay rates are being used, enter the Start Date and End Date for this Union Class entry. These dates are used to calculate the employees pay rate.
If date-sensitive pay rates are not being used, enter all 9s in the End Date field. The Start Date field will default to zeros when you click OK.
Entering a date range that conflicts with that of an existing record for this Employee will generate an error message. The conflicting date ranges must be resolved before continuing.
Entering a date range that conflicts with that of an existing record for this Employee will generate an error message. The conflicting date ranges must be resolved before continuing.
Note: We recommend you take print screens before deleting these entries and/or print a listing of the Union Class File from the Payroll File Listings menu
Rate Calculation Notes
For hourly rates, the week-ending date is used to calculate a date for each of the 7 days of the week.
These dates used in conjunction with the day number entered, at payroll entry time, to calculate the pay rates. With this logic, for each record, the system can get a new rate during the week.
If you enter a day number as zero, the system will use day seven (7) to calculate the pay rates.
Click to process these entries and display the Union Class Master Detail screen. |
|
Click to return to the Main Menu without saving changes. |
|
Click to display the Copy by Record screen on which to select a record to copy and set up new pay rates by Union. |
|
Click to return to the Union Class Copy screen on which to select Record to copy and set up new pay rates by Union. |
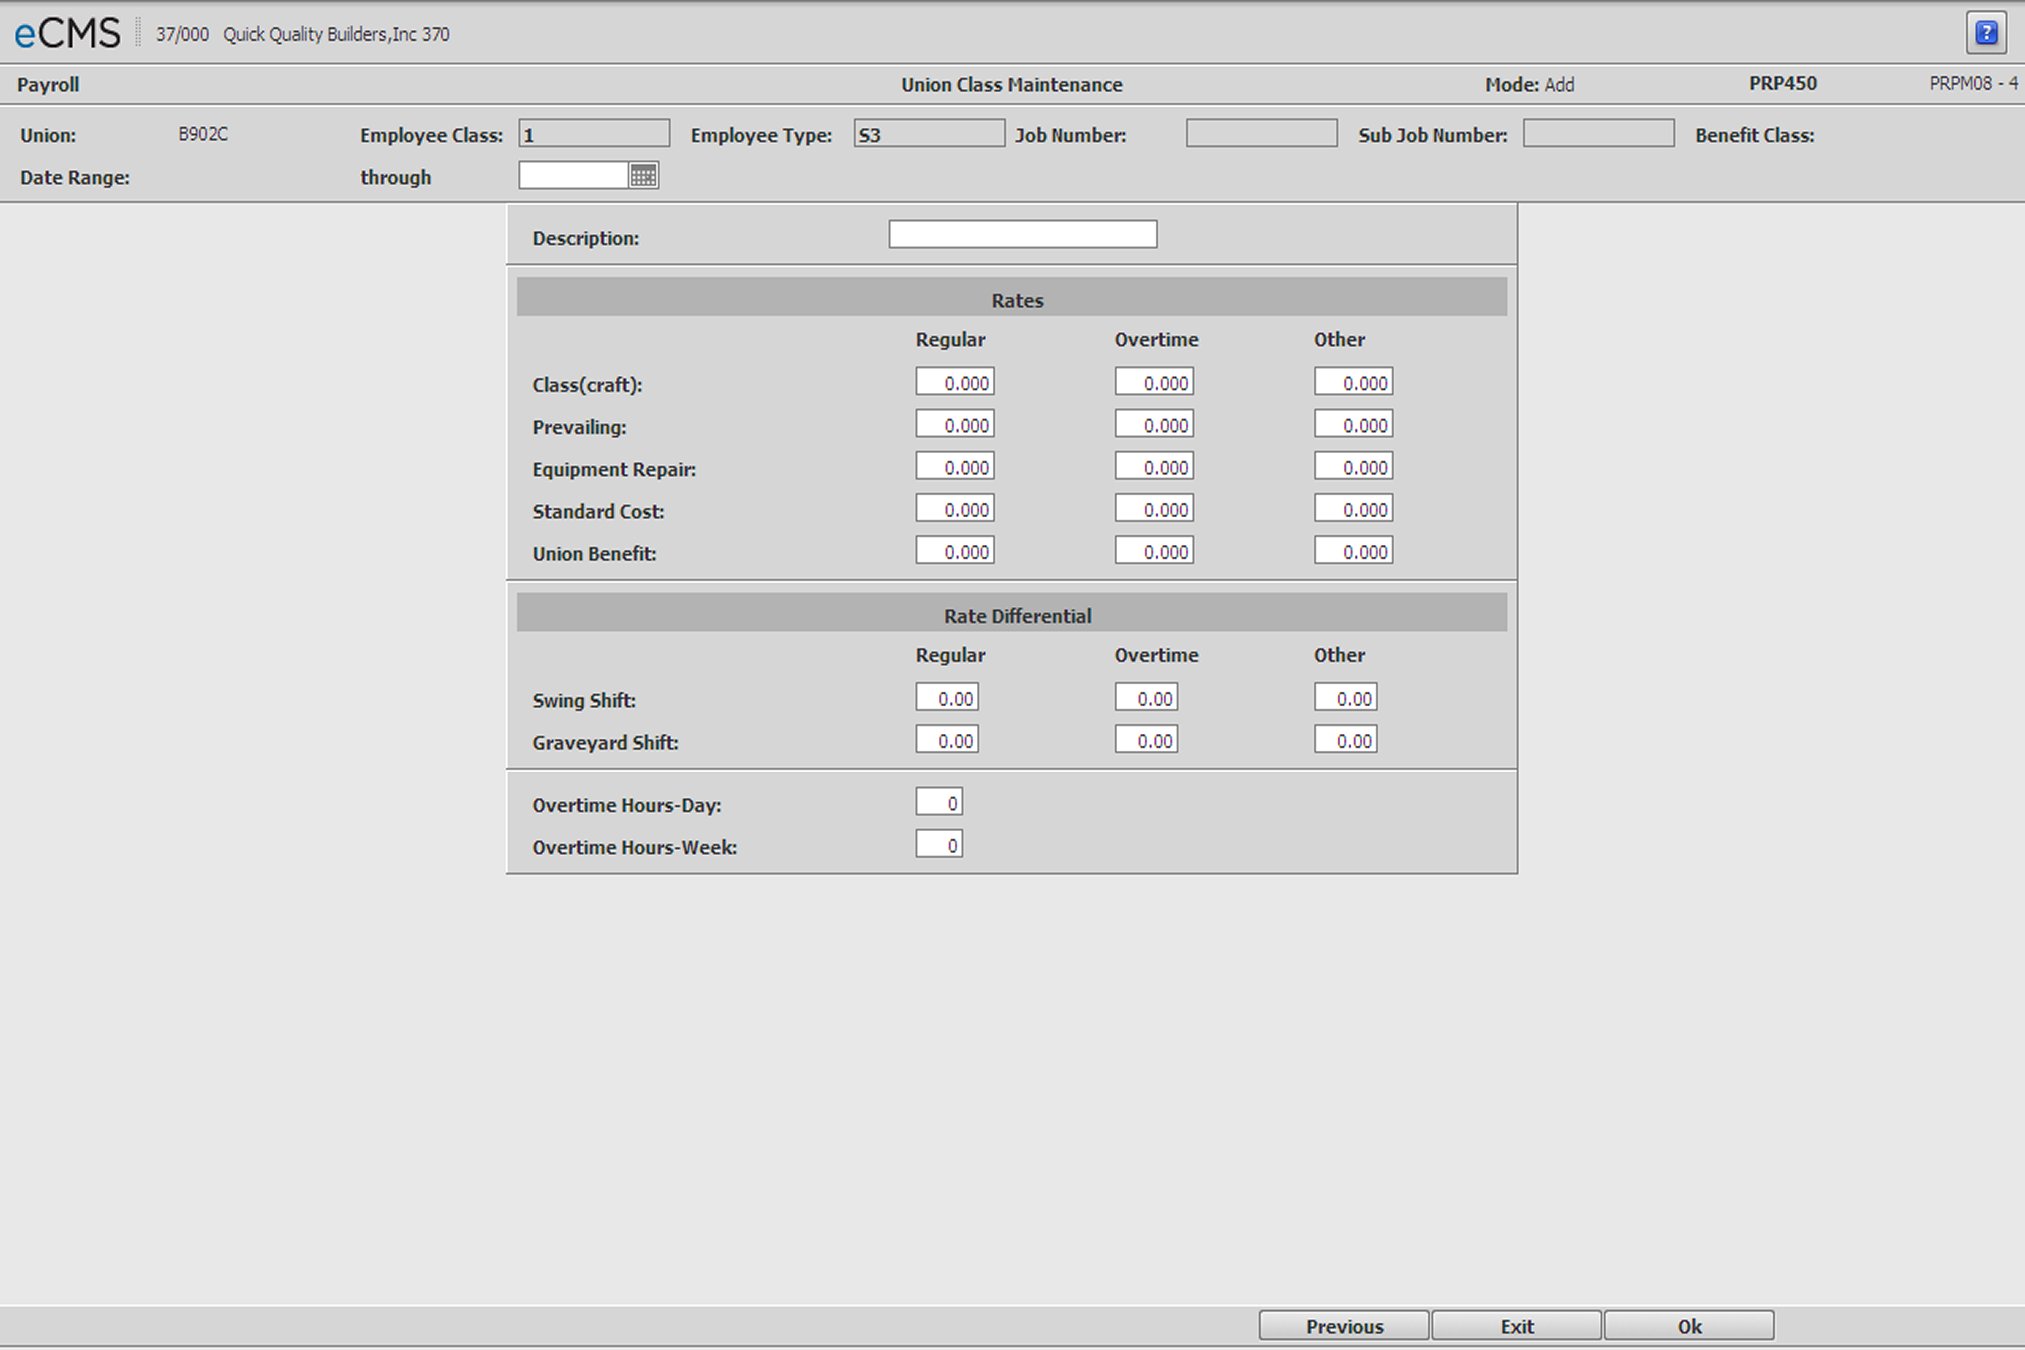
Union Class Master Detail screen
The following rules apply to this screen:
If any of the Standard Cost fields are used, values must be entered in all three - Regular, Overtime, and Other.
Overtime and Other are not calculated automatically.
Regular rates should be entered for all five categories if the Company uses the standard 150% for overtime and 200% for double-time calculations.
The Payroll Entry program will calculate Overtime pay at 150% of regular pay, and Other pay at 200% of regular if the Overtime and Other fields for Class (craft) and Equipment Repair are left blank. If the Overtime and Other rates are not the same as the system default, enter all three rates.
The calculated rates will print on the Union Class Listing, and are not displayed on this screen.
Through
Enter a new through date, if necessary. Click the icon to make this selection from a calendar. An error message will be generated if the new through date conflicts with existing records.
Description
Enter a description for this Union Class. If you will be printing Prevailing Wage rates and Class Descriptions on your check stubs, you should consider using this field to denote the pay classification. Printing Prevailing Wage rates and Class Descriptions is currently mandated by the State of New York, for Public Works jobs, and can be set up using the Print Class Description on Paycheck option in the Job Description file.
Rates
Enter the Regular, Overtime, and Other hourly rates for Class (craft), Prevailing Wage Fringe, Equipment Repair, Standard Cost and/or Union Benefit for this Union Class. These fields are 7 characters in length. They will accept a decimal point and up to 6 digits, three of which are decimal places.
A dollar amount must be entered to calculate Regular, Overtime, or Other rates.
Class (craft)
Enter the current rates of pay for this Union Class.
Prevailing
This field is used to calculate Overtime pay for Prevailing Wage jobs.
The Wage Rate is broken out into:
Base Rate + fringe benefits
Overtime is calculated as:
Base Rate *1.5 + fringe benefits.
Enter all three fields if Prevailing Wage Fringe applies to the three rate types.
Equipment Repair
Enter Equipment Repair pay rates if applicable. These rates are applied to entries made on the Payroll Entry Equipment Repair Selection screen during Payroll Entry.
Standard Cost
Enter the Standard Labor Cost Rates, if applicable. When using Standard Costing, the Employees are paid at the Class pay rates and Jobs are charged at the Standard Cost rates.
Leave the Standard Cost fields at zero to post actual pay rates to a Standard Cost Job for this Employee Class/Type. See Job Description, Standard cost Job documentation for details.
These rates override the Standard Cost Rates in Payroll defaults.
Union Benefit
The rates entered in these fields will be used as the basis for all union benefit processing, instead of the rates paid to the employee.
Rate Differential
A "Rate Differential" is the difference between two rates.
Example: If the Regular hourly rate is $15 and the Swing Shift hourly rate is $15.50, the Rate Differential would be 50 cents (.50).
Enter the Regular, Overtime, and Other Rate Differentials for the following categories (when applicable):
Swing Shift
Graveyard Shift
These fields are 6 characters in length. They will accept a decimal point and up to 5 digits, 2 of which are decimal places.
Note: These rates override the Rate Differential rates in Payroll defaults.
Overtime Hours-Day
Enter the number of hours in a day after which overtime begins. This Payroll Entry program to calculate overtime.
Overtime Hours-Week
Enter the number of hours in a week after which overtime begins. This field is used by the Payroll Entry program to calculate overtime.
Click to process these entries and return to the Union Class Master Selection screen. |
|
Click to return to the Main Menu without saving changes. |
|
Click to return to the Union Class Master Selection screen without saving changes. |
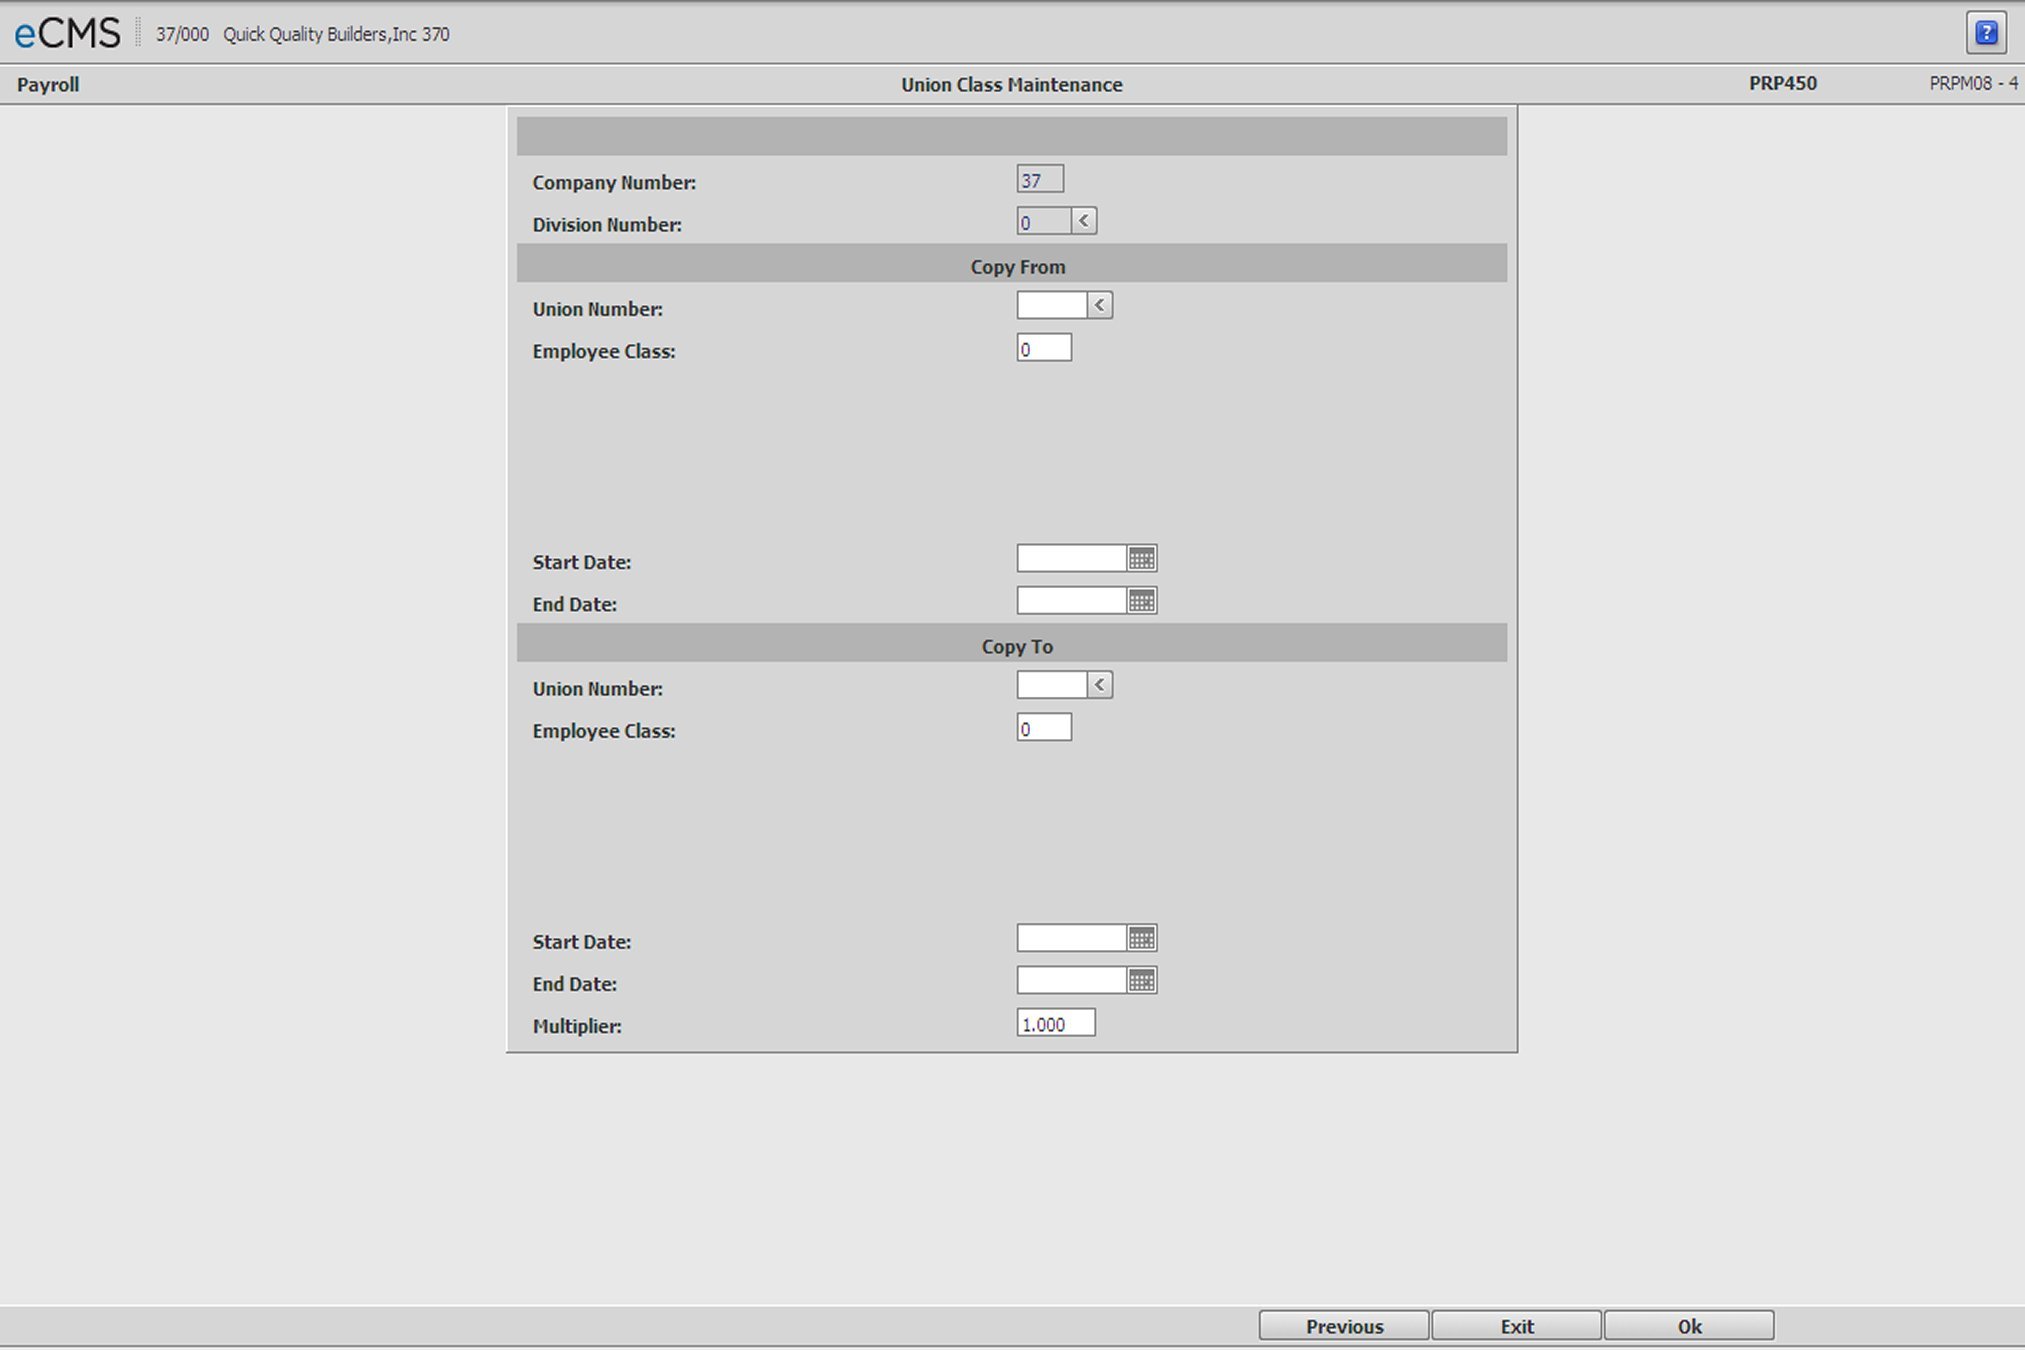
This screen is accessed from the UNION CLASS COPY button on the Union Class Master Selection screen.
Company/Division Number
Accept the Company/Division used at login, or click the Division Number prompt to make new selections from a list.
Copy From
Union Number
Enter the Union Number from which to copy, or click the prompt to select from a list.
Employee Class
Enter an Employee Class from which to copy, or click the prompt to select from a list. This class must be associated with this Union Number.
Start Date
Enter the date (MM/DD/YYYY) the Employee Class went into effect, or click the icon to select from a calendar.
End Date
Enter the date (MM/DD/YYYY) the Employee Class ended, or click the icon to select from a calendar.
Copy To
Union Number
Enter the Union Number to which this information should be copied, or click the prompt to select from a list.
Employee Class
Enter an Employee Class to which this information should be copied, or click the prompt to select from a list. This class must be associated with this Union Number.
Start Date
Enter the date (MM/DD/YYYY) the Employee Class went into effect, or click the icon to select from a calendar.
End Date
Enter the date (MM/DD/YYYY) the Employee Class ended, or click the icon to select from a calendar.
Multiplier
It is not absolutely necessary to use the multiplier. These amounts can be modified after the records have been copied.
The value entered will increase or decrease the amounts being copied.
For example, if the new rate is to be:
Increased by 8%, enter 1.080
Decreased by 8% enter .920
The original record (Copy From) remains on the system. Remove old records by clicking the DELETE button on the Union Class Master Detail screen.
Click to copy the selected records from the specified date range, apply the multiplier (if applicable), and return to the Union Class Master Selection screen. |
|
Click to return to the Main Menu without saving changes. |
|
Click to return to the Union Class Master Selection screen without saving changes. |
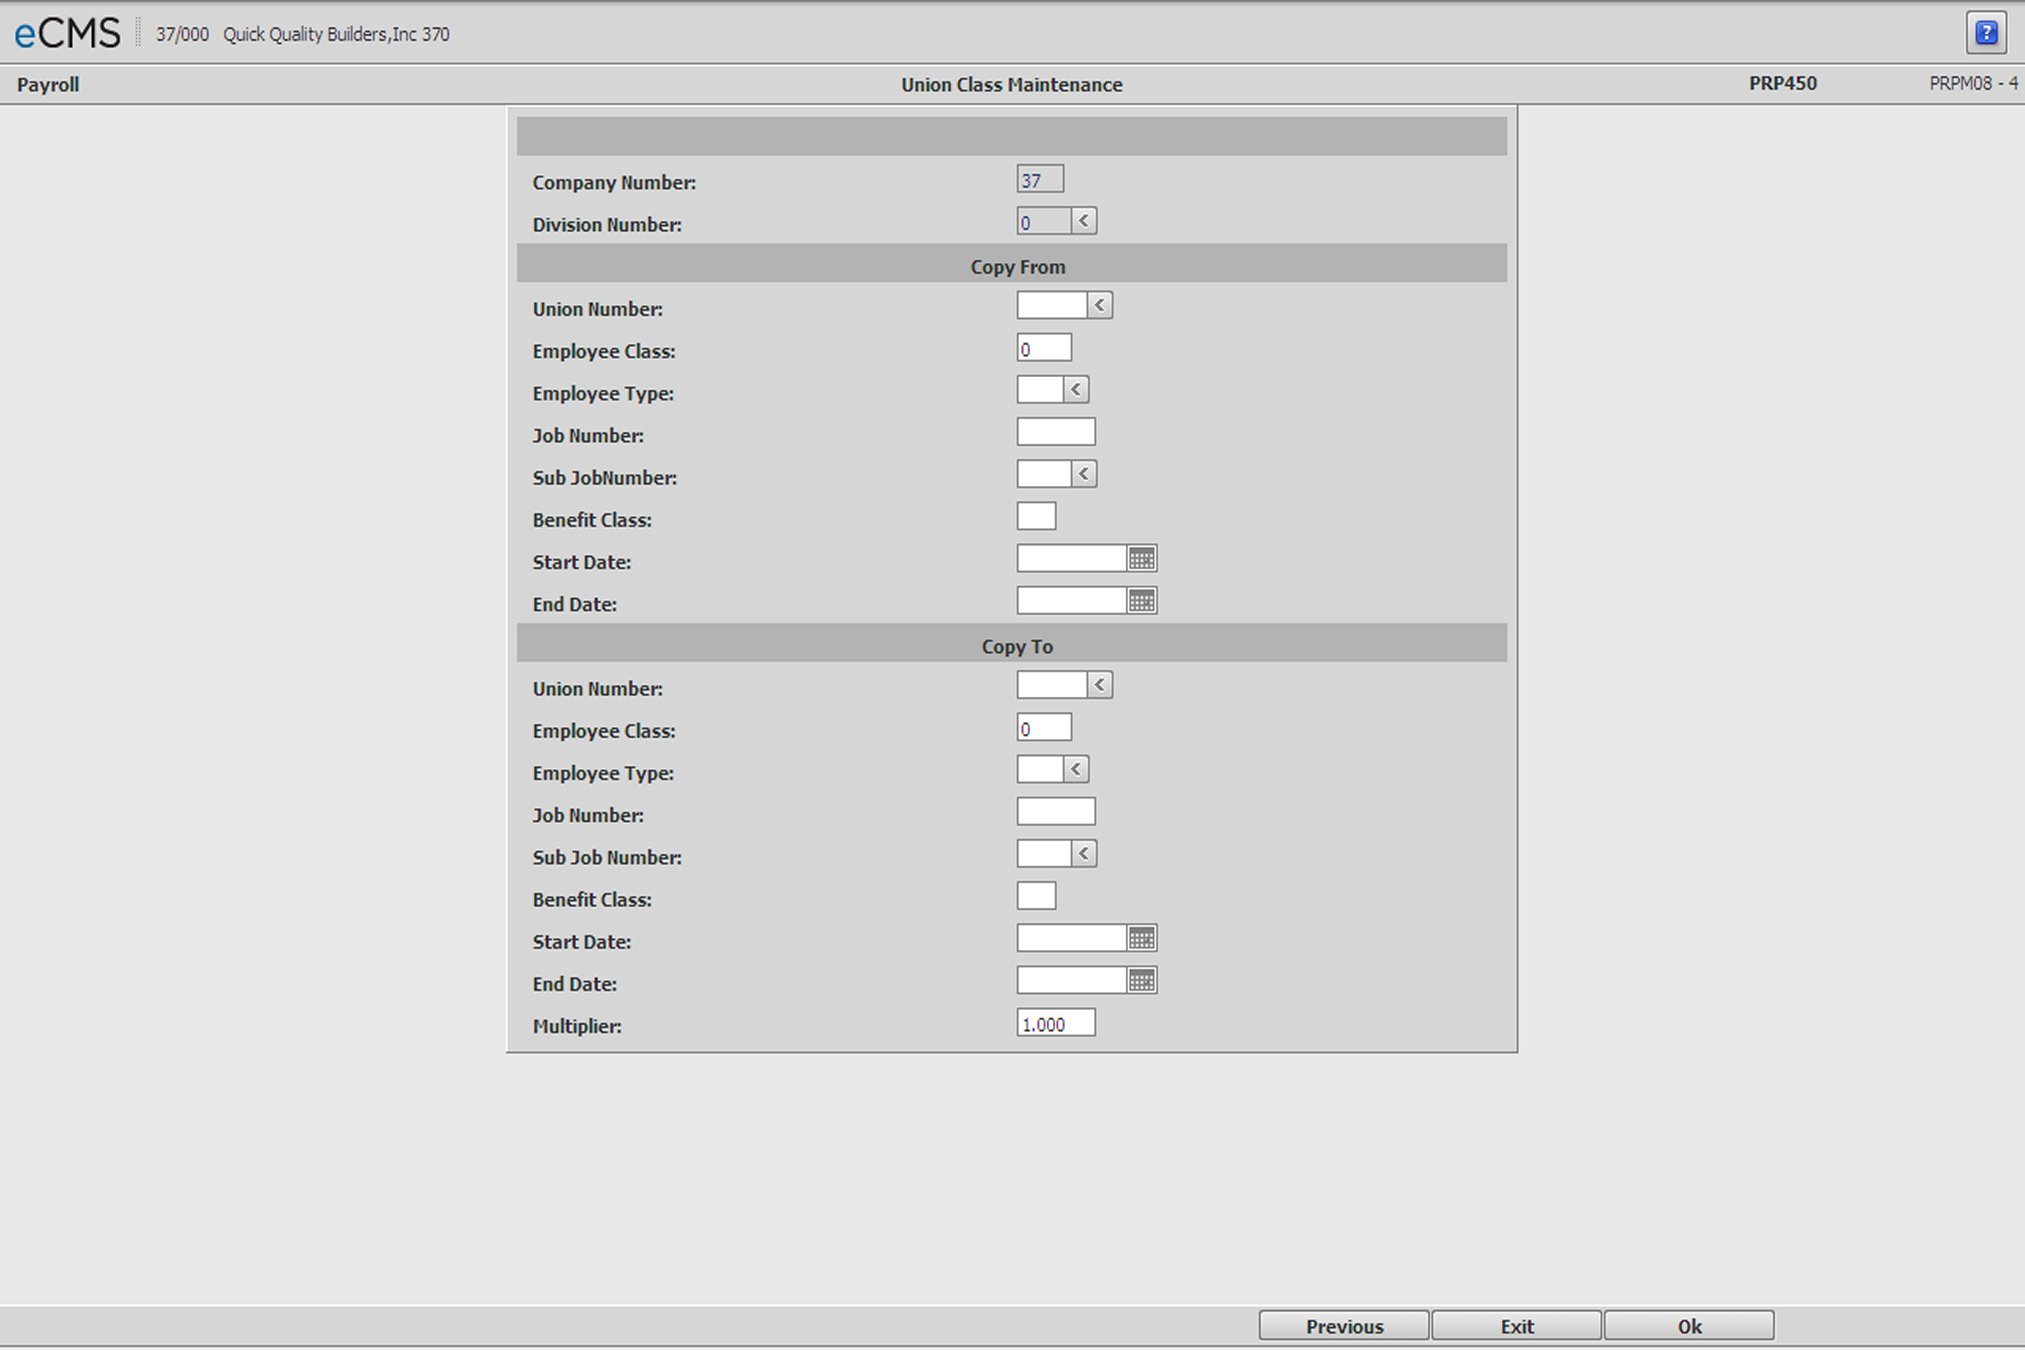
This screen is accessed from the COPY BY RECORD button on the Union Class Master Selection screen.
Note: The COPY BY RECORD function is the same process as COPY BY INDIVIDUAL in eCMS v.3.4.3.
Company/Division Number
Accept the Company/Division used at login, or click the Division Number prompt to make new selections from a list.
Copy From
Union Number
Enter a union number code or click the prompt to select from a list. This number must be set up in the Distribution Master and the Union Master. A code of 000 is not valid.
Employee Class
Enter an employee class code. The code can be a union number or any other selected code. (Code 000 is not valid).
Employee Type
This description is used on the Usage (EEO) Report.
If you have various types of employees within an employee class, you must build a separate record for each type.
Enter the Employee Type. This code is used to designate a type of employee within the same Employment class, such as foreman (FR), journeyman (JR), apprentice (AP), and so on.
Enter the Employee Type to create or modify, or click the prompt to select from a list.
Job/Sub Job Number
Enter the Job/Sub Job number for the records being copied, if this Employee Class record applies to a specific job. Click the Sub Job prompt to make these selections from a list.
Entries must be made to Employee Class and Employee Type prior to designating a Job/Sub Job.
Benefit Class
Enter the Employee Benefit Class of the records being copied.
Start Date
Enter the date (MM/DD/YYYY) the Employee Class went into effect, or click the icon to select from a calendar.
End Date
Enter the date (MM/DD/YYYY) the Employee Class file ended, or click the icon to select from a calendar.
Copy To
Union Number
Enter the Union Number to which to copy, or click the prompt to select from a list.
Employee Class/Employee Type
Enter an Employee Class and Type to which to copy, or click the Employee Type prompt to make these selections from a list.
A record containing this combination of Employee Class and Employee Type must currently be set up in the Employee Class Master, and used by this Union.
The Employee Type is used to differentiate between the types of Employees within each Employee Class, and within the same Union.
Job/Sub Job Number
Enter the Job/Sub Job number to which the records are being copied, if this Employee Class record applies to a specific job. Click the Sub Job prompt to make these selections from a list.
Entries must be made to Employee Class and Employee Type prior to designating a Job/Sub Job.
Benefit Class
Enter the Employee Benefit Class to which the records are being copied.
Start Date
Enter the date (MM//DD/YYYY) the Employee Class went into effect, or click the icon to select from a calendar.
End Date
Enter the date (MM/DD/YYYY) the Employee Class file ended, or click the icon to select from a calendar.
Multiplier
It is not absolutely necessary to use the multiplier. These amounts can be modified after the records have been copied.
The value entered will increase or decrease the amounts being copied.
For example, if the new rate is to be:
Increased by 8%, enter 1.080
Decreased by 8% enter .920
The original record (Copy From) remains on the system. Remove old records by clicking DELETE on the Union Class Master Detail screen.
Click to copy the selected records from the specified date range, apply the multiplier (if applicable), and return to the Union Class Master Selection screen. |
|
Click to return to the Main Menu without saving changes. |
|
Click to return to the Union Class Master Selection screen without saving changes. |
![]()