Use this option to print the Labor Control report, which reflects Period, Year, and Job to Date Labor Cost totals. This report balances totals to General Ledger records.
Note: The Cost Type setting for Labor (L) must be set to Y for Track Hours or report does not print. See, Report Default Selection screen.
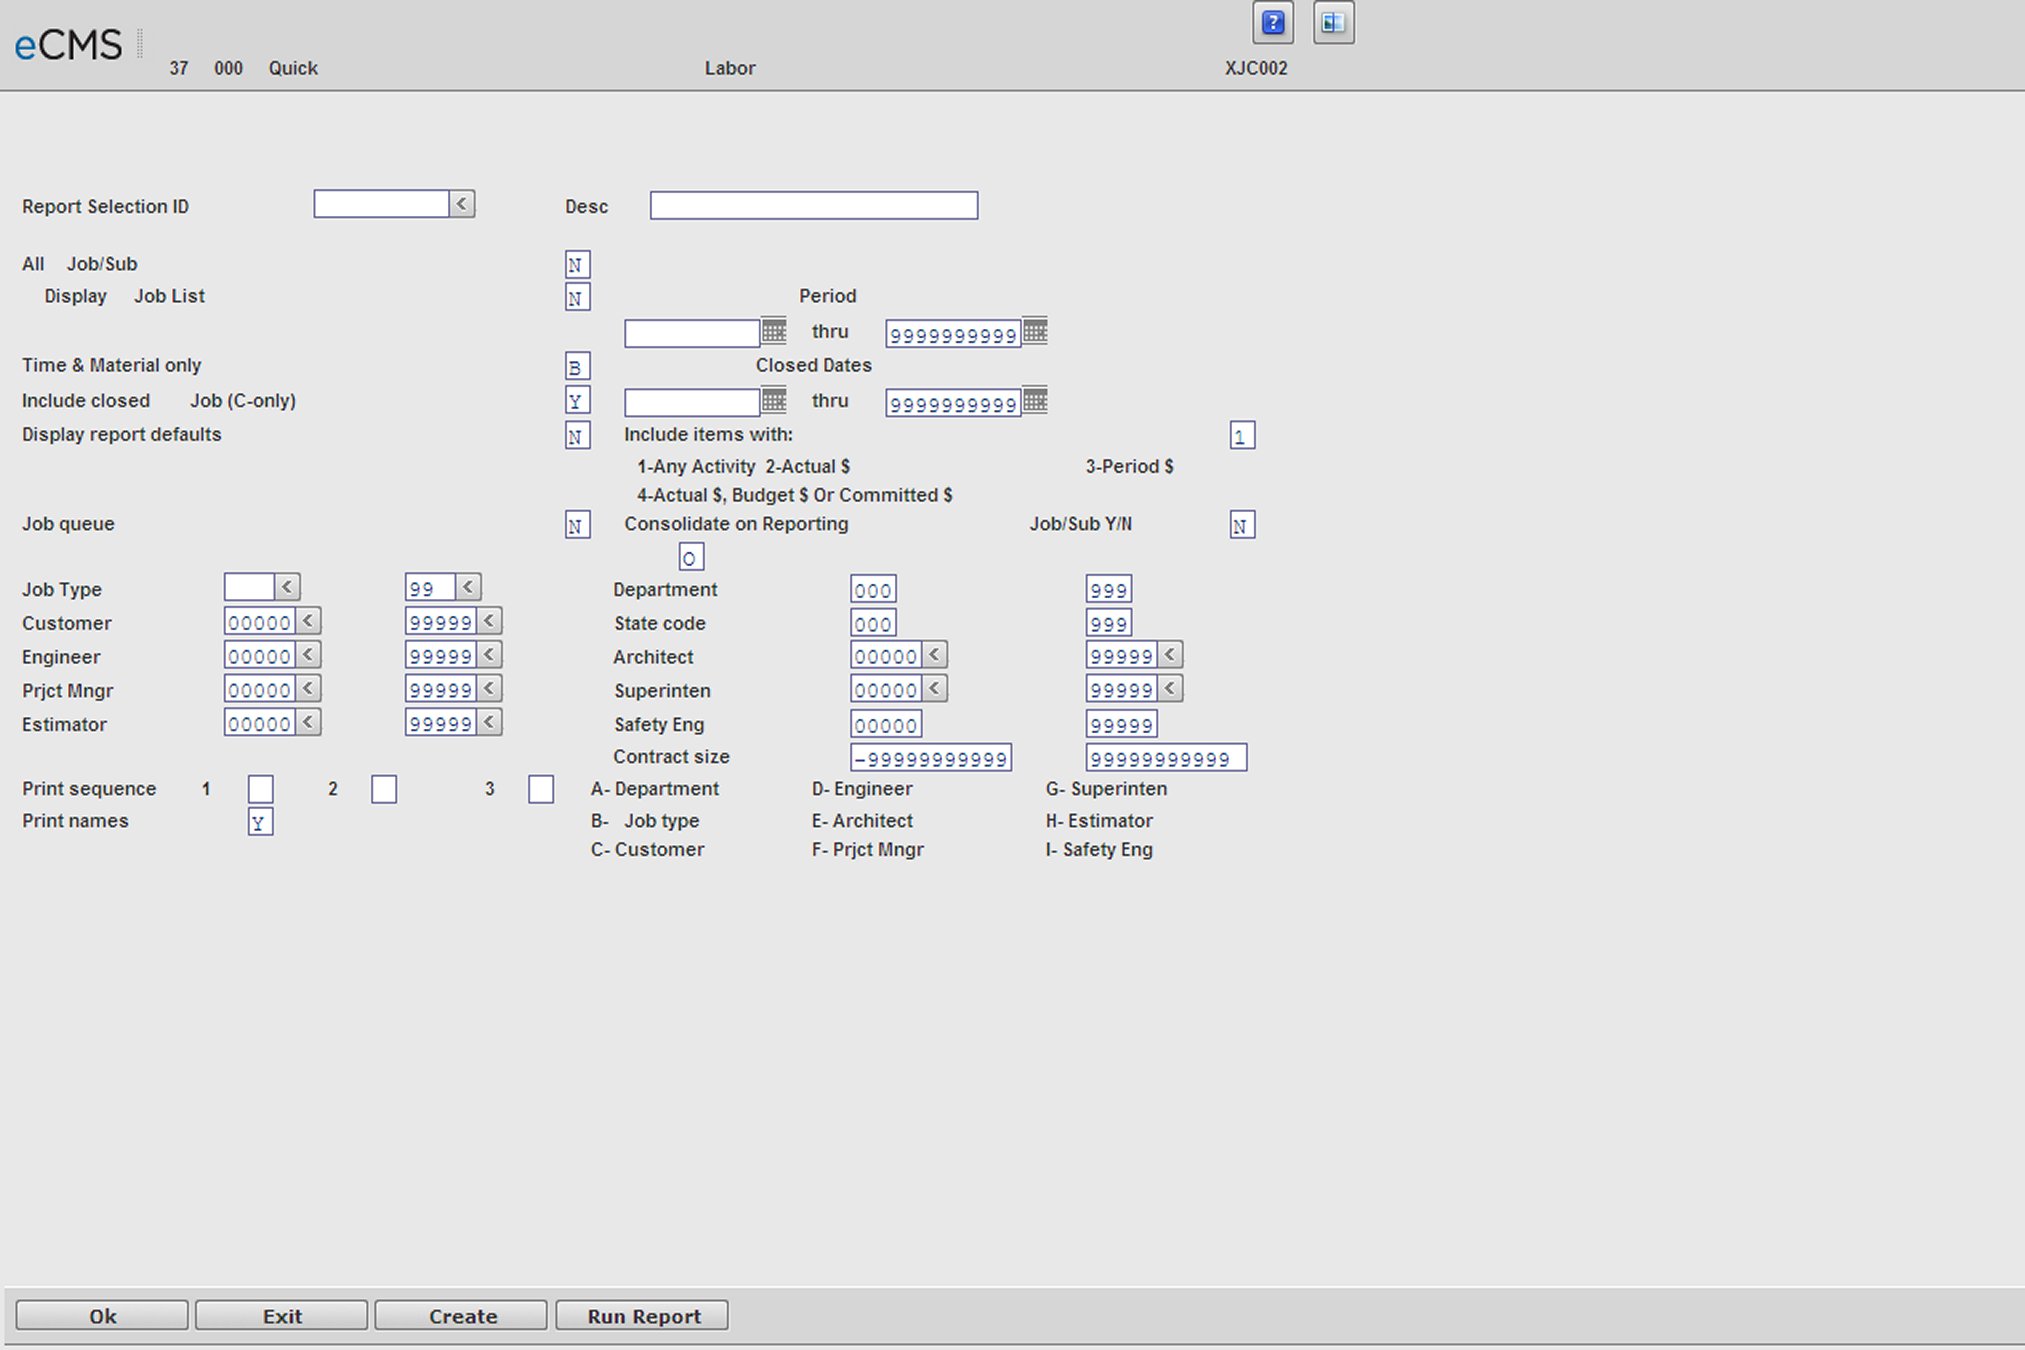
Labor Control Report Selection screen
Report Selection ID
Select the appropriate report selection ID. To create a new Report Selection ID, enter that number and provide a description. When you have finished supplying the following field information, click the CREATE button.
All Job/Sub
Y |
All Jobs are included in the report. |
N |
Clicking OK or CREATE will open the "Detail Job Selection screen" on which to select the individual Job/Sub Jobs to include. |
R |
Clicking OK or CREATE will open the "Range Job Selection screen" on which to select a range of Job/Sub Jobs to include. |
Display Job List
Y |
Clicking OK or CREATE will open the "Job List Selection screen". |
N |
Clicking OK or CREATE will open the "Detail Job Selection screen". |
Time and Material Only
Y |
Include only Time and Material Jobs. |
N |
Include only Contract Jobs. |
B |
Include Both T&M and Contract Jobs. |
S |
Include only Service T&M and Service Contract Jobs. Jobs are coded Service Time & Material by setting their Time and Material field, in the Job Description file, to Service. |
Include Closed Jobs
Y |
Include both closed and open Jobs. |
N |
Include open Jobs only. |
C |
Include closed Jobs only. |
Closed Dates
Use the adjacent fields to define a range of dates for the Jobs included on the report.
Display Report Defaults
Y |
Clicking OK will open the Report Default Selection screen. |
N |
Use the current system default settings. |
Include Items with
This field displays only when the Job Cost default, Print Job Cost w/Activity Only, is set to Y. It does not display for all reports.
1 |
Any Activity |
2 |
Actual Costs |
3 |
Period Costs |
4 |
Actual Costs/Budget Costs or Committed Costs Only those records that have a non-zero amount in any of the following three columns: Actual Cost, Current Budget or Total Committed Cost, will be included on the Job Cost Actual Committed Report. If any records have zeros in all three columns, the report will not include those records when processed. |
Job Queue
Y |
Process the Job within the Job queue. |
N |
Process the Job before other Jobs within the Job queue. |
Consolidate on Reporting
Set this option to Y to consolidate the Job/Sub Jobs into one detail report based on this reporting Job/Sub Job number.
The remaining fields are used to further define the Jobs and Sequence for printing. These fields are maintained in the Job Description file.
And (A)/Or (O)
A |
Jobs satisfying ALL the selection requirements will be included in the report. |
O |
Jobs satisfying ANY of the selection requirements will be included in the report. |
For the following criteria, enter ranges to be used when compiling this report.
|
|
|
|
|
|
|
|
|
|
|
|
Print Sequence
Enter up to three sort sequences on which to base the report:
A |
Department |
E |
County Code |
B |
Job Type |
F |
Project Manager |
C |
Customer |
G |
Superintendent |
D |
Engineer |
H |
Estimator |
Print Names
Y |
Print the names of the project manager, superintendent, architect, etc., from the Job Description file. The names print in the heading area of the report. Use the Job Description Names option on the Job Cost File Maintenance Menu to enter descriptions for the Name Codes entered in the Job Description file. |
Click to open a detail screen determined by these entries. |
|
Click to return to the Main Menu without processing entries. |
|
Click to save these entries under a new Report Selection ID. |
|
Click to run this report. |
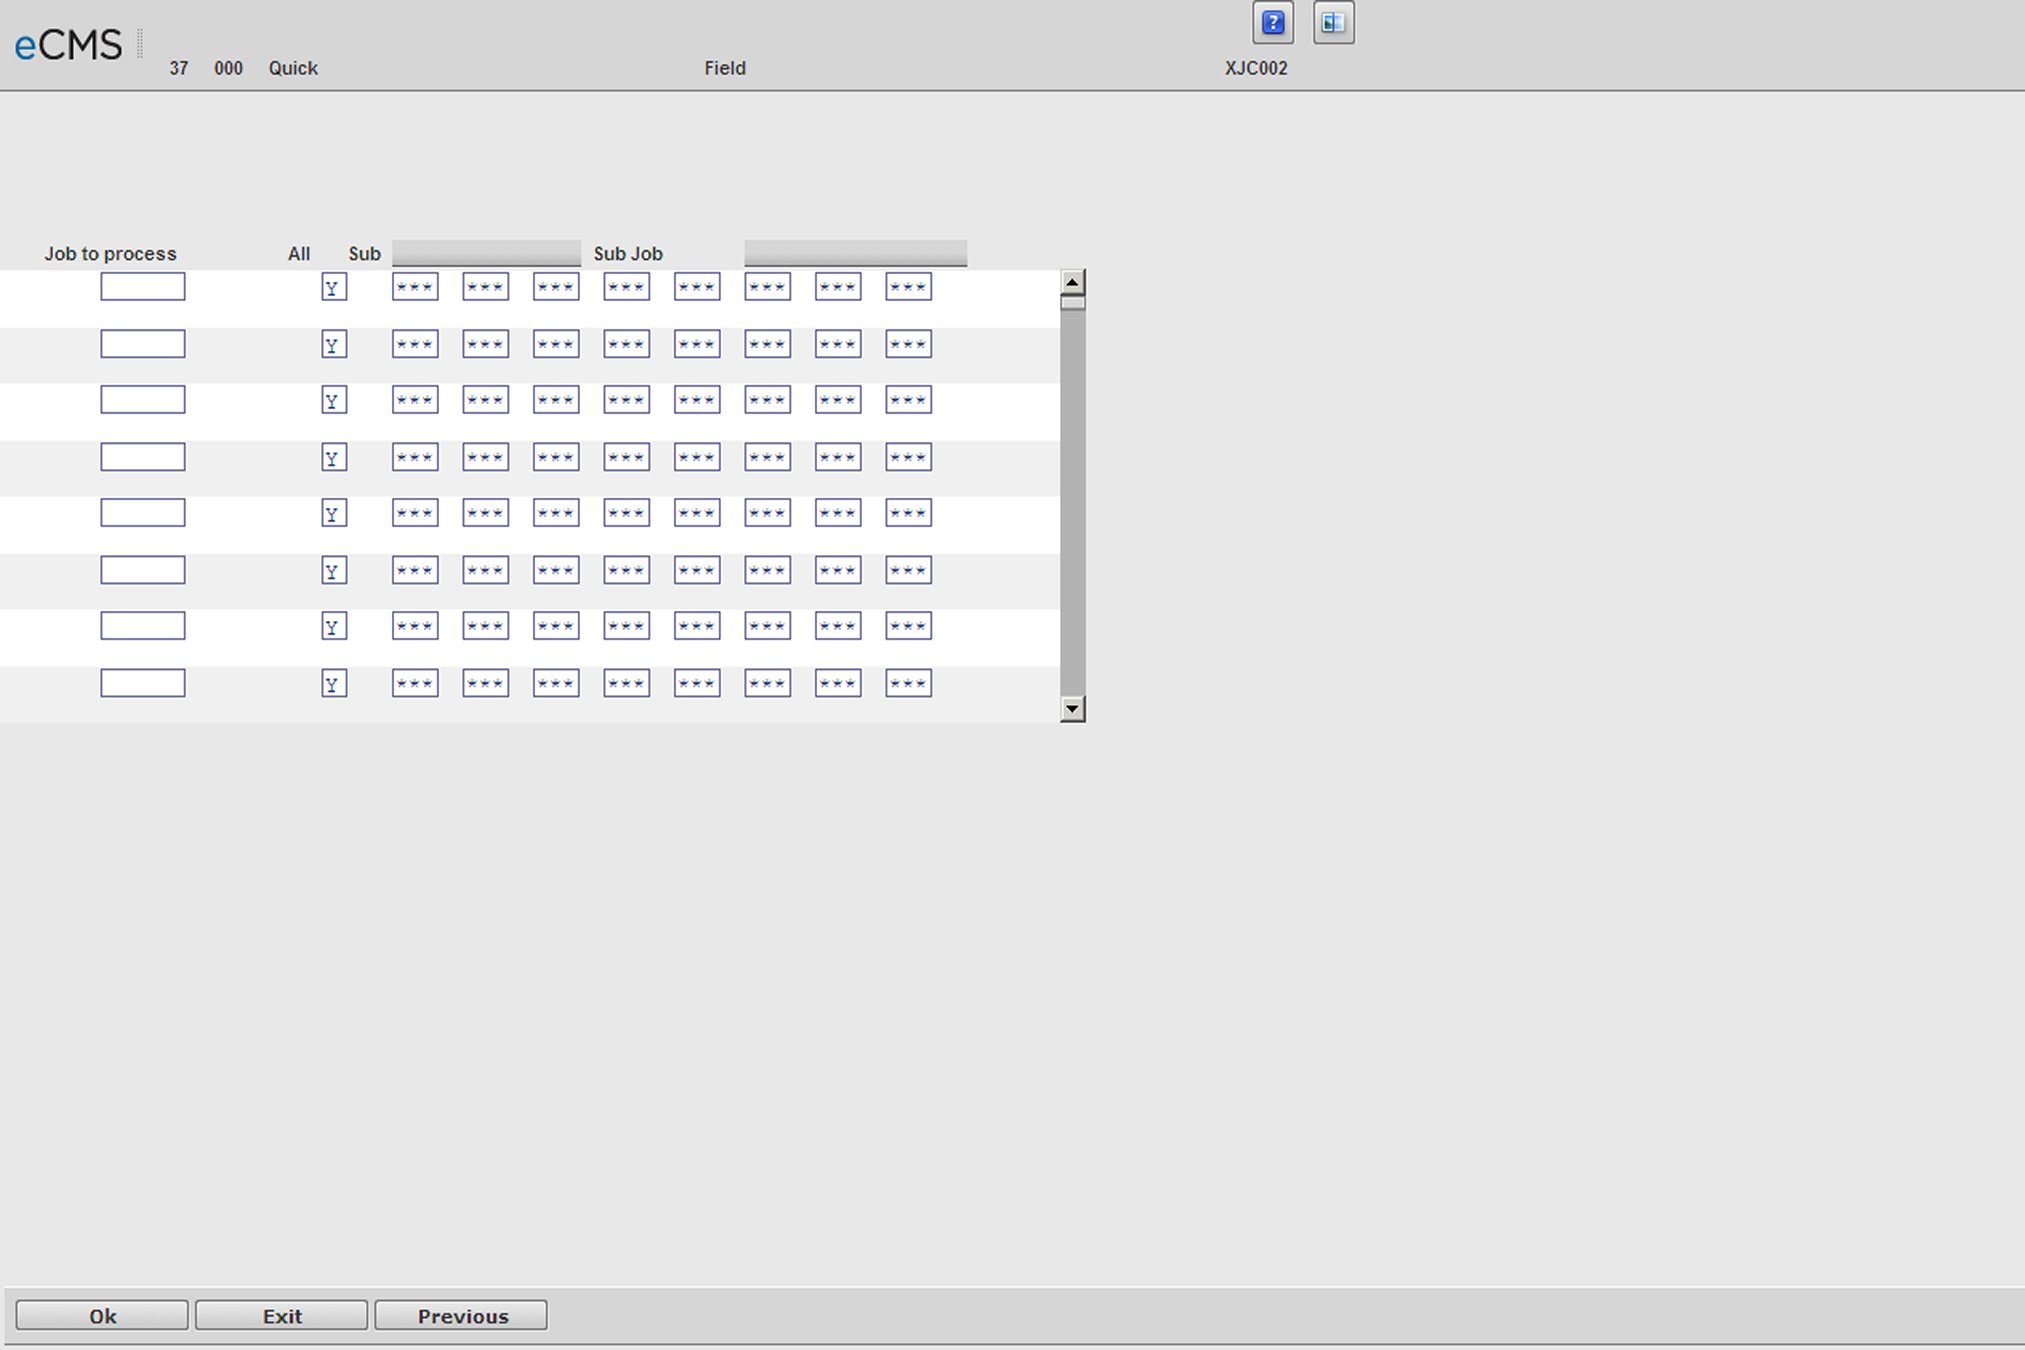
The Job Selection screen displays when the All Job/Sub and Display Job List fields are set to N. This screen is used to key in individual Job/Sub Jobs to be processed. If an entry has been made on the eighth Job line, clicking OK will display additional Detail Job Selection screens.
Click to run the report or open another detail screen based on the entries on the Labor Control Selection screen. |
|
Click to return to the Main Menu without processing entries. |
|
Click to return to the Labor Control Selection screen without processing entries. |
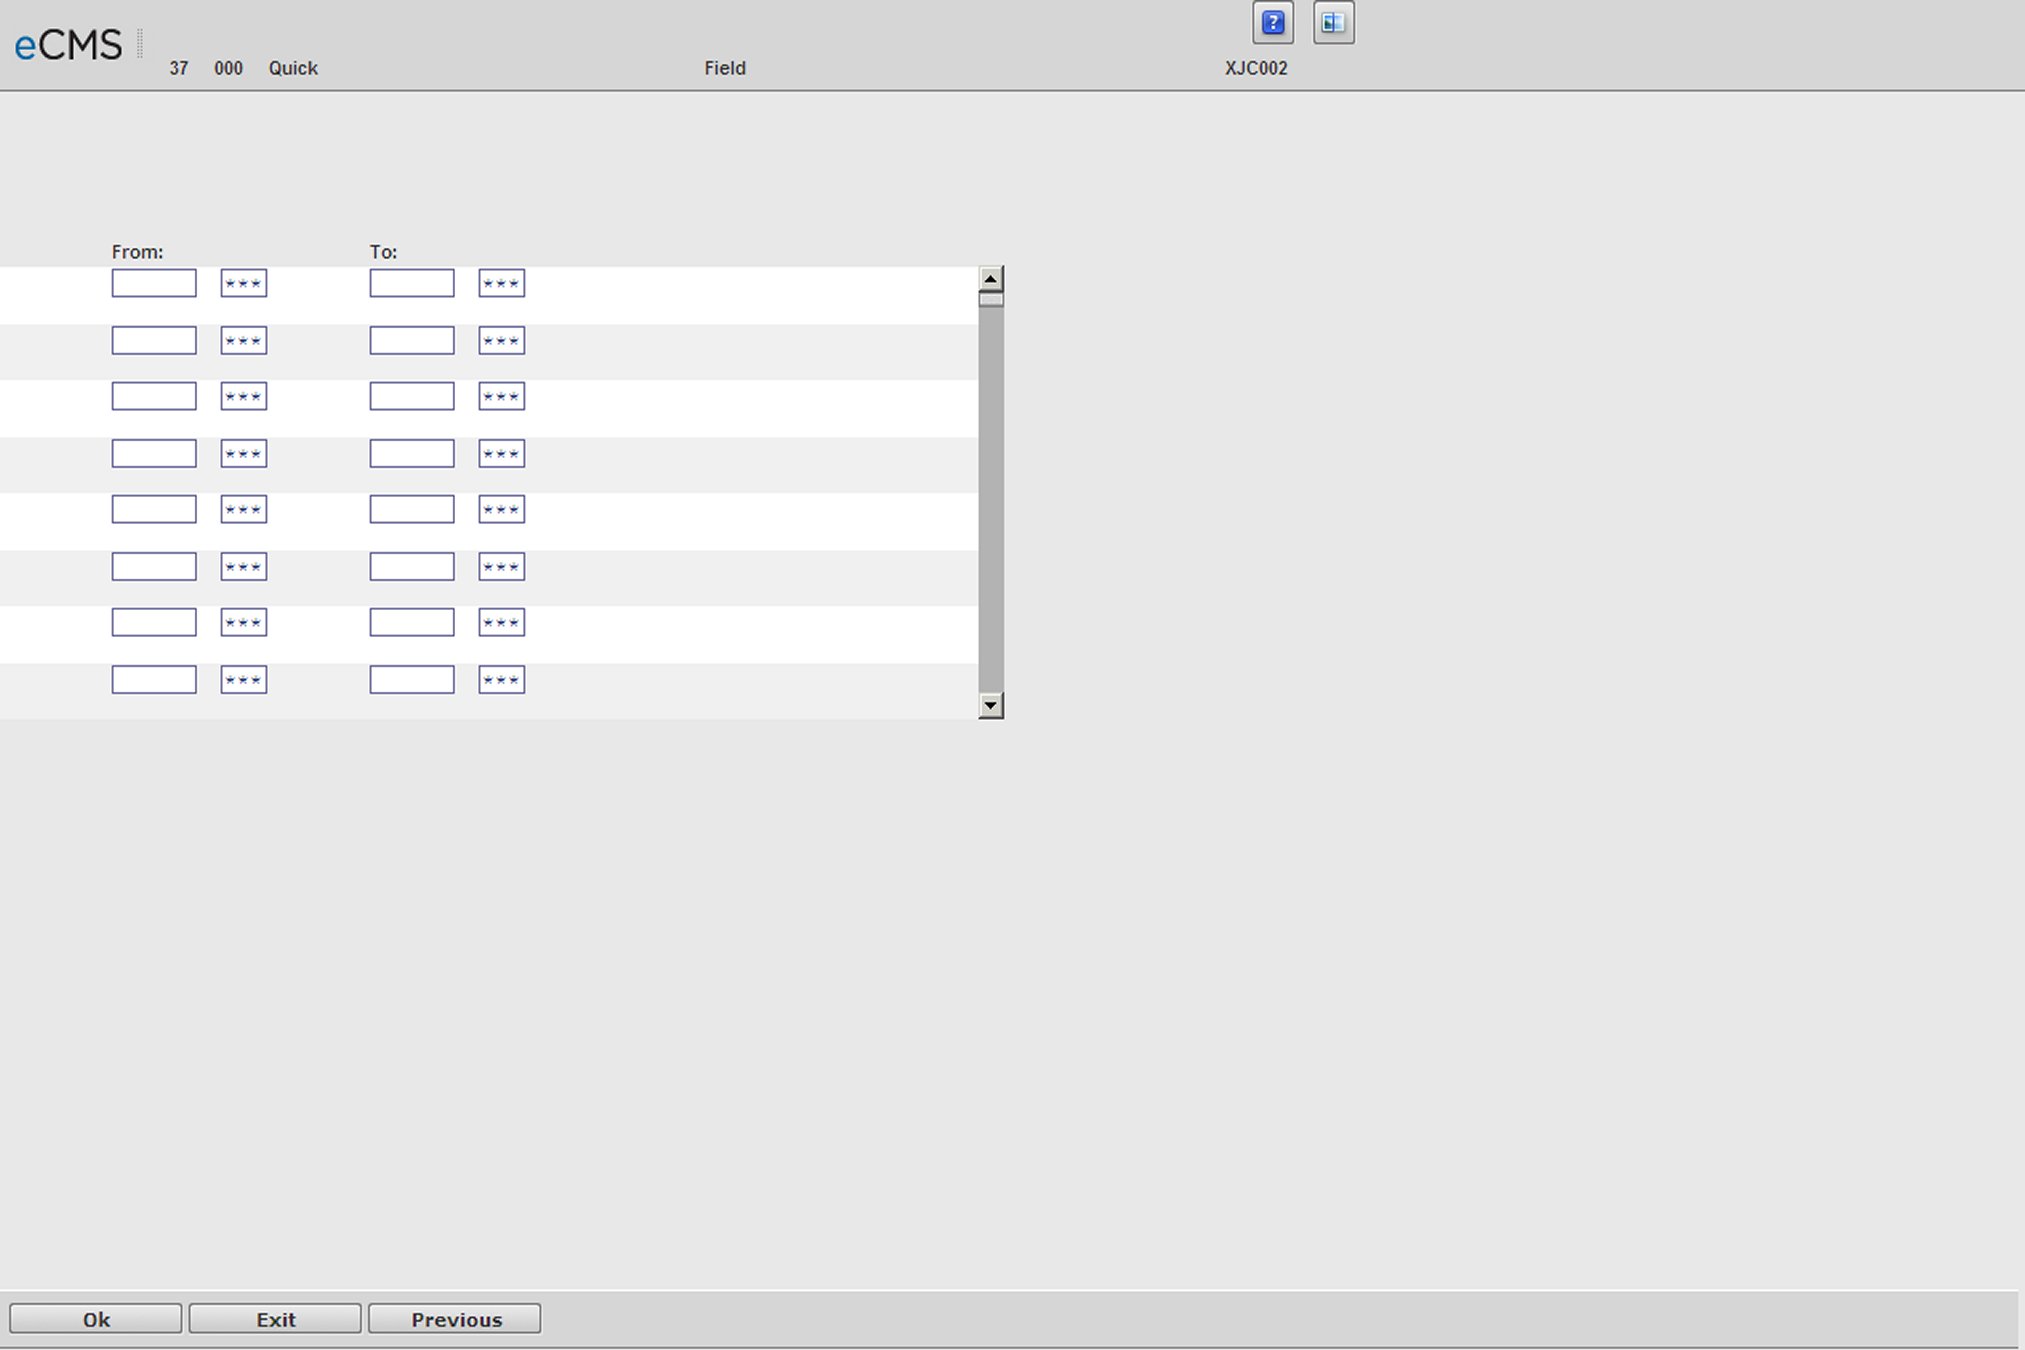
The Range Job Selection screen displays when the All Jobs/Sub Jobs field is set to R. This screen is used to enter the Job/Sub Job ranges to be reported. If an entry has been made in the final (8th) range, clicking OK will display an additional Range Job Selection screen.
Click to run the report based on these entries. |
|
Click to return to the Main Menu without processing entries. |
|
Click to return to the Labor Control Selection screen without processing entries. |
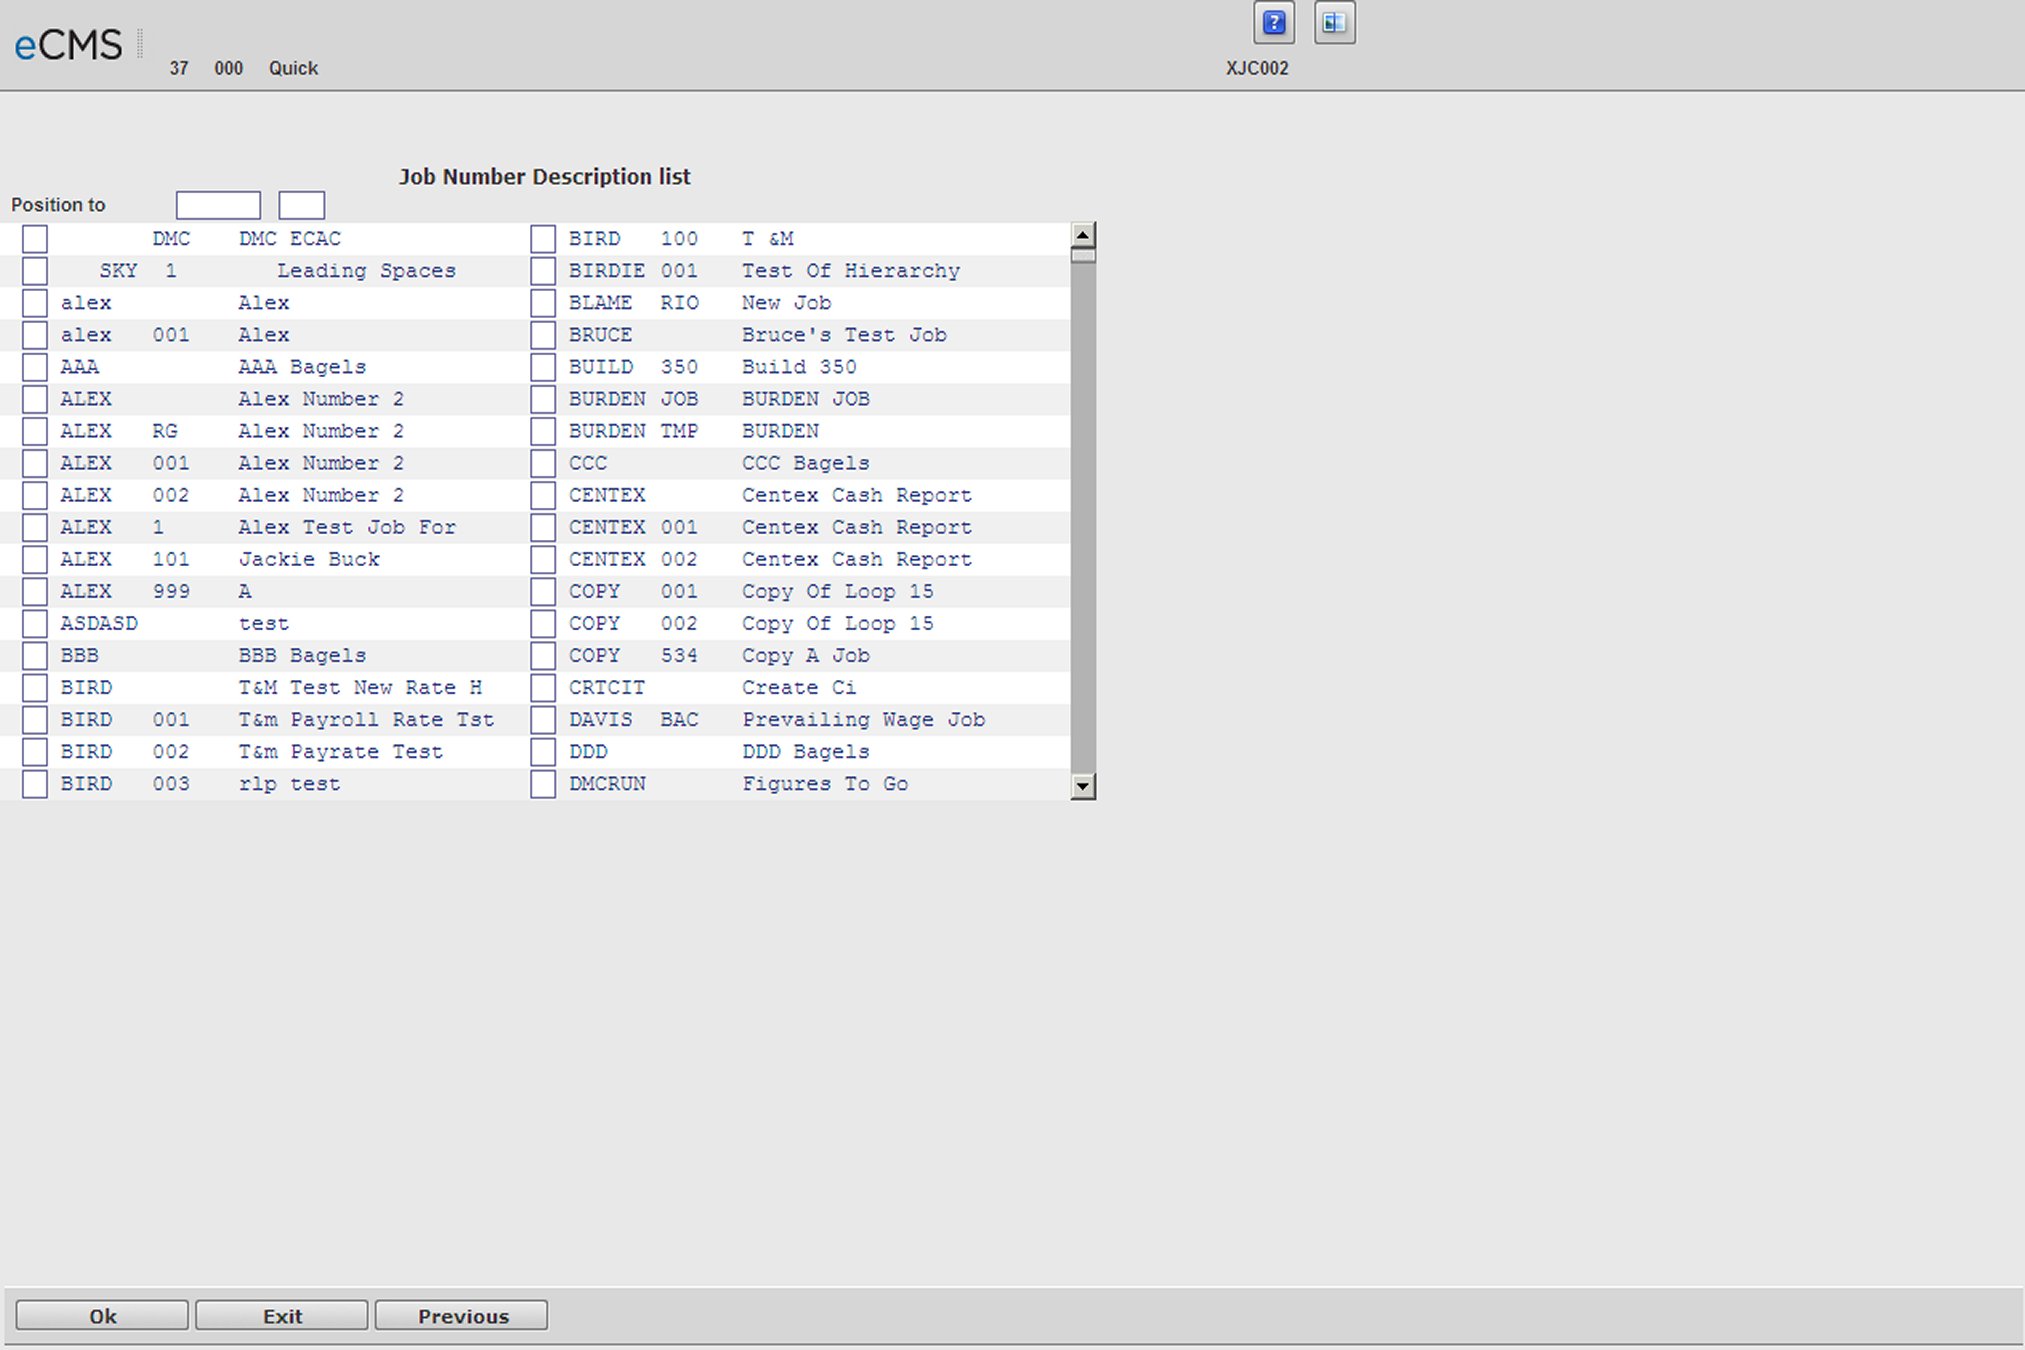
The Job List Selection screen displays if the All Jobs/Sub field is set to N and the Display Job List field is set to Y. This screen is used to place an X next to the Job/Sub Jobs to be reported. If more than thirty-six Jobs are on the system, click OK to continue on to the next Job List Selection screen.
Click to run the report based on these entries. |
|
Click to return to the Main Menu without processing entries. |
|
Click to return to the Labor Control Selection screen without processing entries. |
![]()